Administrator Tasks
Contents
- 1 Getting Started
- 2 Configuring Basics
- 3 Working With Directories
- 4 View and Edit Directory Categories
- 5 Printing Business Category Reports
- 5.1 Print List of Categories
- 5.2 Print List of Members & Associated Categories
- 5.3 Membership Types
- 5.4 Member Information Center Setup
- 5.5 Customize the Member Information Center
- 5.6 Define which Menu Options/Functions are Available in the MIC
- 5.7 Control members access to other member email addresses in the MIC
- 5.8 Create your own Menu Selections for the MIC
- 5.8.1 Customize the MIC Home Page Welcome Message
- 5.8.2 Enable and Customize Promote Your Business Widget in MIC
- 5.8.3 Enable/Disable the Promote your Business and the Upgrade Your Listing Widget
- 5.8.4 Edit the Message on Promote Your Business and the Upgrade Your Listing Widget
- 5.8.5 Determine the Email Recipients of Promote Your Business and the Upgrade Your Listing Widget
- 5.8.6 Customize Forgot Password Error Message
- 5.9 Customize the Member Information Center MIC Help
- 5.10 Customize the Member Information Center MIC4 Search
- 5.11 Customize the Member Information Center Features Available
- 5.12 Social Network Publishing
- 5.13 Customizable Menu selections
- 5.14 Customize the Website Modules
- 6 Customize your Event Settings
- 6.1 Modify Business Directory Control Panel
- 6.2 Modify Hot Deals Settings
- 6.3 Modify MarketSpace Settings
- 6.4 Credit Card Processing
- 6.5 Internet Fax Service
- 6.6 Miscellaneous Settings
- 7 Help Documentation
Getting Started
When your ChamberMaster software if first installed, one or more users will be designated as Administrator. These individuals should ensure that your database is configured with some basic settings. As you continue using your software, you may desire to customize many different settings such as Custom Fields, Online Event Calendar preferences, and Member Information Center options.
If you are just getting started with Admin Tasks, watch this 32 minute overview video ![]()
Configuring Basics
The ChamberMaster/MemberZone support team works with your association as your data is converted and imported. Many items will already be customized to you. However, having a comfort level with viewing these selections and knowing where to change them if needed may be desired.
Four areas are commonly referenced in the first weeks of using your software:
- Business Information (association name & address etc)
- General Options (integration settings)
- Employees/Reps (staff login names and passwords)
- Business Categories (member online directory categories)
Setup Organization Information
Information in these fields will be the default business information displayed within your software and on certain integrated web pages. This information should be populated on initial setup of your database, and anytime your contact information (address, email, etc.) or your logo changes.
- Click Setup in the left-hand navigation bar.
- Click Association Information in the Association Options area.
- Edit the desired fields on the General Association Information screen.
- Ensure your association's name and address is complete and accurate. This address is used where addresses are automatically pulled from the database. For example - it will be used on the default invoice template.
- Select the correct country and time zone.
- Update your phone numbers and website.
- Enter in your association's generic email address. NOTE: This email is used when automatic emails are sent from the database as the from address, as well as when your organization's email is merged as a database field, such as on on invoice templates.
- Upload your association's logo for display at various places through the software. See Upload Your Logo for details.
- Click Save.

Upload Your Logo
Your association logo will appear at designated areas throughout your integrated website and in the Member Information Center if you have it uploaded. If using Integrated Billing, it will also display automatically on default Invoice templates.
- Click Setup in the left-hand menu.
- Click Organization Information.
- Click the + (plus sign) in the Business Logo area.
- Click the + (plus sign) to browse your drive for the desired image.
- Note: The folder path that is displayed here is not significant and is not accessible at this time at any other location in the software. Future plans are that these images should be accessible at a common location so they can be used throughout the software. This folder is not visible in the Cloud Drive at this time. You are not able to navigate up to any other folder from this location.
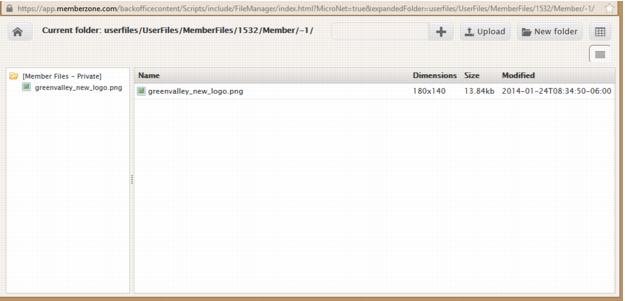
- Once you’ve selected (clicked) the desired image, click Upload.
- Click OK on the successful message.
- Click the desired image Name in the list.
- Click Select.
- Position the selection window around the area of the image that you’d like displayed.
- Click Crop & Save.
- Click Save Changes.
General Options & Settings
Many settings in this area have been preset based on your individual configuration with ChamberMaster. You may not have to change any selections shown here. Contact Customer Support if you are unsure of the effect of changes. If making any changes, please record the current settings before making any modifications.
- Click Setup in the left-hand navigation bar.
- Click General Options & Settings in the Association Information area.


General Settings
- Auto-update representative contact information when updating members': This will default to on for new associations. Existing associations will have to check to select this option so that individual representative information will automatically update when matching member information General tab is updated. When the member's address, primary phone or fax number is updated and it exactly matches the representative's address, work phone or fax then the matching representative(s) field(s) will be updated as well.
- Send automatic email notification to member when their submission for deals/jobs/events/news etc is approved: Defaulted to on. Members will receive an automatic email when staff sets their submission to Approved. No notice is sent if a submission is disabled or deleted. The email is sent to the following email address based on this criteria:
- Member created the content, no primary rep designated: Member is recipient.
- Member created the content, 1 or more primary rep designated: Primary rep(s) is recipient.
- Rep created the content: rep is recipient
- Note: if a valid email address is not associated with the rep or member, then no email will be sent.
- Default Member Status: When new members are created by clicking the Add button on the toolbar, the Status drop-down will have the default status selected here. Choices are: Active, Courtesy, Non-Member, Prospective, or Dropped.
- Newsletter Solution: If you have a subscription to Constant Contact, select Constant Contact. This will display Constant Contact menu choices within ChamberMaster/MemberZone. Note: Also complete the Constant Contact section in the Add-On Manager area below.
- Active Social Network Services: This will display the Social Networks that you have enabled. Click the edit social network services link to add or delete social networks.
- Allow representatives to create a login/password from the Login screen: When this option is selected, a No Log-in created? Sign Up Now link will be displayed on the MIC log-in page. After clicking to Sign up now, the rep enters their email address. If their email address exists in your database, on only rep, a verification email is sent to that address where the Create Account link is provided. Last Name is requested if the rep email exists more than once on a single member. If their email address does not exist in your database, they are advised to contact your organization for additional information.
- Redirect /login page to the https:// secure version: With the January 2017 release of Chrome version 56, we are making an SSL login page available for your members - to be enabled at your discretion. As a trusted voice to your membership, we are allowing you to enable this secure login page when you desire since we realize that a redirect from a familiar login page to a different-looking login page could cause concern without proper warning.
- Use drop-down lookup list that is optimized for a larger number of records: Select this option if you wish to use the type-ahead search result that not only displays results that match the "start of the record" but also displays those that match 'any part of the record name".
Enable Social Network Services
You can select with Social Network Services you wish to enable for your members under General Options & Settings.
- Click Setup in the left-hand navigation panel.
- Click General Options & Settings in the Association Options section.
- In the General Settings, scroll to Active Social Network Services:. The social networks that you have currently enabled will be displayed.
- Click the edit social network services link to add or delete social networks.
- To add a new social network, click the Add a New Type button.
- Enter the Provider Name and the Provider Website (optional).
- Click Continue.
- Click Save on the General Options & Settings page.


Sponsorship Ads (Banners) Settings
- Enable Sponsorship Ads
- Use Complete-Package banners as filler in contexts with no other banners
- Premium Banner Position
- Premium Banner Size
- Non-ChamberMaster Banners
- Max Banners in Rotation
Appearance Settings
- Info Request Release Disclaimer: This is the message that displays on your Info Request page.
- Info Request - Thank you Message: This is the text that will appear in the browser after someone has submitted an info request.
Email Server Settings
Email Relay Service:

In Outlook (or whatever email program you use), include your association’s unique archive address as a BCC. The software will look at the address sent/replied to and place it on the communication history of the associated member. Emails with addresses that are not recognized will still be archived but placed under Communication > Manage Unmatched Archive Emails where you can go to view and manually match them to the appropriate member.
![]() View a video showing how to archive an email
View a video showing how to archive an email
_in_the_database_even_whe-Communication.1.004.2.jpg)
In the example above, this email will be recorded on the member record that has the email address of Joshua.johnson@gvpiping.com
|
|
NOTE::
|
SPF Record check prior to sending email: Select this setting if you have properly configured your SPF record with the appropriate entry. See details on how to do that here. If this setting is enabled, emails that are sent through your database will only be sent on to the recipients after being checked against your SPF record. Having this extra check against the SPF record will eliminate scenarios where someone maliciously sends an email making it look like the email came from you but really was sent from another IP address. This extra check will verify that the sender of the email is truly from your domain.
Opt Out Messages
Opt-out message display at the bottom of emails sent from groups. Default messages have been configured for you, but you may customize them as needed. Setup > General Options & Settings > Email Relay Service.

- Internal Email Disclaimer:appear on emails sent from inside the database, typically emails sent from you to your members. Disclaimers do not appear on the bottom of emails sent using the “Send with Outlook” selection.
- Public Email Disclaimer: Click Here for details of the Public Email Disclaimer messages.
Add-on Manager
- API Access: An Application Programming Interface (API) is available to 3rd party developers that wish to create their own applications from your database. If you have someone wanting to develop a special-use application for you, contact support@growthzone.com to receive a unique API key for your developer and the API documentation. Access is only granted to a 3rd party developer with your express permission.
- AccuWeather: If you will include the weather module on your web-site, enter the zip-code to be used in gathering weather information.
- ConstantContact Integration Setup: If you have a subscription to Constant Contact, record your subscription login and password here. Having the login credentials recorded here will allow automatic opening to your Constant Contact account from certain menu selections in ChamberMaster/MemberZone. For example: Communication-> Newsletters/Email Campaigns. To also allow ChamberMaster/MemberZone to automatically update your Constant Contact lists, select one or both of the synch checkboxes. See Enable Constant Contact Synchronization for more information.
- Fax Solution: If you have a subscription to an Internet Fax Service, select that here and record the appropriate email addresses. These settings allow you to configure ChamberMaster/MemberZone to use your fax server. When sending letters, and designating that communication is delivered via fax, the appropriate output will be sent to your selected email fax service who in turn will deliver it to your fax recipients.
- LiveEdit: If you are using LiveEdit as your Content Management System, record your login credentials here. This will place a shortcut button on your toolbar to allow quick access to edit your website. See Enable LiveEdit button for more information.
- Votility Integration Settings: If your organization uses Votility you can integrate your Votility account with your ChamberMaster or GrowthZone account. This provides a more seamless experience for your members by enabling them to access Votility directly through the Member Information Center without them ever needing to create a separate login or account on Votility. (requires Member Information Center v4). To integrate Votility you simply need to supply two pieces of information from your Votility account: Your Votility Organization ID and your Votility API Access Key. To find this information, log into votility enterprise management and use the navigation links on the left to find the "API Settings" page. From that page, copy your Organization ID and API Access Key to these boxes and click the Update button. This will complete your integration, enabling a link to Votility in the Member Information Center for your members and an Administrator login link on the backoffice dashboard.
- Zoom: We now have the ability to integrate ChamberMaster/MemberZone Events with Zoom Meetings. Once enabled, you'll be able to sync your event in ChamberMaster/MemberZone to Zoom, and when synced, ChamberMaster/MemberZone will automatically create the event in Zoom. Attendees will utilize the ChamberMaster/MemberZone event registration form and be tracked in ChamberMaster/MemberZone just like any other attendee. Once registered, they'll be captured in your Zoom event, and will automatically be sent the confirmation email from Zoom. See below for more details.
Add-on Manager - Zoom
|
|
Available with Plus edition or greater of ChamberMaster/MemberZone. |
We now have the ability to integrate ChamberMaster/MemberZone Events with Zoom Meetings. Once enabled, you'll be able to sync your event in ChamberMaster/MemberZone to Zoom, and when synced, ChamberMaster/MemberZone will automatically create the event in Zoom. Attendees will utilize the ChamberMaster/MemberZone event registration form and be tracked in ChamberMaster/MemberZone just like any other attendee. Once registered, they'll be captured in your Zoom event, and will automatically be sent the confirmation email from Zoom.
ChamberMaster/MemberZone will automatically pass over the following information to Zoom if available: First Name, Last Name, Email Address, City, Country, Postal Code, State/Province, Phone, Organization and Job Title.
Best practice: Do not select any Zoom registration Questions or Custom Questions in your Zoom registration setup.
More details: It is not necessary to select any of these fields in your Zoom registration setup; it won't affect the registration if you do but it does not make any difference because the data noted above is automatically passed through. However, please note that marking any of the registration questions or custom questions as required in Zoom registration setup is not supported and will cause the registration to fail.
|
|
IMPORTANT: You must have at minimum a Pro subscription to Zoom to use the Zoom Integration with ChamberMaster/MemberZone. |
Please note:
- If a registrant comes to the event LIVE, they will not be marked as attended in GrowthZone.
- The Zoom sync works only with Zoom Meetings and is not available for Webinar-type events in Zoom (i.e. Zoom + Webinar).
Connecting to Zoom
With Zoom integration, you can create your events in ChamberMaster/MemberZone and have the corresponding meeting created in Zoom. To enable Zoom integration:
- Click Setup in the left-hand navigation panel.
- Click “General Options & Settings” in the Association Options section.
- Expand the “Add-On Manager” section and scroll to “Zoom Meetings Integration”
- Click “Connect with Zoom” and follow the prompts to complete authorization. Note: Your login credentials for Zoom must be that of an "Owner or Admin". Other login profiles will not authorize the connection to your Zoom account.


Once you have connected, you will be able to sync your events to Zoom on the event's General tab, under Event Information. Events synced will automatically be created in Zoom. When attendees register, they will receive confirmations from Zoom with login instructions.
Uninstalling the ChamberMaster/MemberZone Zoom Integration
To uninstall the ChamberMaster/MemberZone Add-On from your Zoom account:
- Log in to your Zoom Account and navigate to the Zoom App Marketplace.
- Click Manage > Installed Apps, or search for the ChamberMaster/MemberZone App.
- Click the ChamberMaster/MemberZone App.
- Click Uninstall.
Disconnecting from Zoom
To disconnect from Zoom:
- Click Setup in the left-hand navigation panel.
- Click “General Options & Settings” in the Association Options section.
- Expand the “Add-On Manager” section and scroll to “Zoom Meetings Integration”
- Click the “Disconnect” button.
Syncing an Event with Zoom
An event can be synced to Zoom through two different screens.
- Top Toolbar -> +Add (Button) -> Event -> Enable the "Sync with Zoom" option toward the bottom of the “Step 2” page of the wizard.
- If an event is already created, go to the General tab of the event in the Events module. At the bottom of the “Event Information” section use the checkbox to enable the "Sync with Zoom" option, and click Save.


|
|
NOTE: ChamberMaster/MemberZone does not let you create a Zoom Meeting with a Start Date / Time prior to the current date time. |
TIPS:
- If entering a test registration in ChamberMaster/MemberZone, make sure to use an email address that is NOT associated to a Zoom Admin or Owner account to have an experience similar to what your registrants will have.
- If there seems to be any issues with the sync, go to the event’s General tab and click Save. This will re-sync the event with Zoom.
- Additional Zoom reminder emails can be configured in your Zoom software. Refer to their documentation for details.
- ChamberMaster/MemberZone confirmation emails can be turned off to keep attendees from receiving two confirmations. Find this setting under Events -> Fees tab. If there are registration fees that are paid when registering, the registrant will still receive the payment receipt email regardless of whether the confirmation email is enabled.
Joining the Zoom Meeting As An Organizer
- Log in to Zoom.
- Navigate to "Meetings" on the left navigation menu.
- Find your meeting and click "Start".

Joining the Zoom Meeting As An Attendee
- Register for an event via the ChamberMaster/MemberZone event registration page.
- You will receive an email from Zoom.
- Follow the link in the email to join the Zoom meeting.
Misc Zoom Info
All Zoom Meetings are created with the following settings, all other settings are defaulted to Zoom’s defaults.
- Video Host: On
- Video Participant: Off
- Meeting Options: Enable Waiting Room
Below are the mappings of ChamberMaster/MemberZone event fields to Zoom Meeting fields.
- Event Title -> Meeting Topic
- Event Start Date/Time -> Time
- Meta Description -> Agenda
Security & Privacy Settings
Within the Security & Privacy Settings you can set optional password requirements as well as configure optional terms and conditions that your members must agree to to apply for membership and access the MIC. These settings are optional and comply with GDPR.
Configure Password Requirements
Password requirements are optional. If enabled, these settings are enforced at all locations where passwords are created for member logins (i.e. MIC login page, Membership Application, Event Registrations, etc).
|
|
NOTE: When you make changes to password requirements, existing users aren’t affected until the next time they change their passwords. |
- Select Setup in the left-hand navigation panel.
- Click General Options & Settings.
- Expand the Security & Privacy Settings section.
- To require specific password conventions, click Enable Password Requirements.
- Enter the conventions you wish to enforce for the following (you are not required to enter a selection for each of the settings):
- Required Password Length: The minimum number of characters required for a password. The default is 8 characters.
- Required Alphabetic Characters: Enter the minimum number of required alphabetic characters. When this is populated, the Required Capital Letters field will be enabled.
- Required Capital Letters: Enter the minimum number of required capital letters.
- Required Numeric Characters: Enter the minimum number of required numeric characters.
- Required Special Characters: Enter the minimum number of required special characters. All standard keyboard characters are allowed.
- Password Settings: If you wish to ensure that your members change their passwords on a regular basis you may:
- Set the number of days after which a member must change password in the After "x" days text box.
- Set an exact date on which the member must change password in the On a specific date text box. Using this option might be beneficial if you have made recent changes to your password requirements, and want to ensure that all members are forced to update their credentials by a specific date.
- Set Password Reuse: If you to ensure that the new passwords created by the user are unique, you can set the number of previous passwords that may not be reused in the Do not allow reuse of the last <1-4> password text box. Valid values are 1, 2, 3, 4.
- NOTE: When Force Password Expiration settings are enabled, the user will be given the option to reset their password as soon as they are notified, or they will be able to click ‘’’Later’’’. If ‘’’Later’’’ is selected, the next time the user logs in, they will be prompted to change their password and will see the number of times they can hit later again.
- Click Save if you have made changes.

|
|
NOTE: In addition to setting password requirements, when Enable Password Requirements is checked, all locations where a password reset link is sent out, an expiration is set on the link (24 hours), with the exception of the initial email sent to a new representative with instructions to create their user name and password. |

Configure User Agreement/Privacy Policy
You can configure an optional user agreement/privacy policy that your members must accept prior to submitting a membership application. This is optional and complies with GDPR. Additionally if enabled, members logging into the MIC, the first time after the policy was enabled, must agree to the terms of the agreement prior to accessing the MIC.
|
|
NOTE: You must enable Require Viewing of Privacy Policy on your Membership Application form to ensure that applicants agree to your terms. See Setting Up the On-line Application Form for further details. |
- Select Setup in the left-hand navigation panel.
- Click General Options & Settings.
- Expand the Security & Privacy Settings section.
- Click the Require Privacy Policy Agreement check-box.
- Type your privacy policy into the body text.
- Click Save.

Updating your User Agreement/Privacy Policy
When a member or applicant accepts the privacy policy, the database will record the date/time of agreement and version of agreement agreed to, IP address and browser version. In the future, when edits are made to your policy text, you'll be asked if you want users to be prompted to agree to your new edited version if they have already accepted a previous version. This allows you to make typo corrections without requiring another agreement from your member. To view who has agreed and to what agreement version, view the Privacy Policy/User Agreement report.
- Select Setup in the left-hand navigation panel.
- Click General Options & Settings.
- Expand the Security & Privacy Settings section.
- Click the Require Privacy Policy Agreement check-box.
- Type/update your privacy policy in the body text.
- Click Save. You will be prompted, “You've just updated your Privacy Policy. Do you want your users to be prompted to agree to this new version if they have already accepted a previous version?”. If answering Yes, this will prompt users that have already agreed, to agree again. No, will not prompt only those users who have not yet agreed to the privacy policy.
Privacy Policy/User Agreement Report
The Privacy Policy/User Agreement Report provides a way for staff to see who has agreed to your policy (and to what version of the policy, etc). The report can also be a source for viewing if someone had agreed to an older version of the policy, in case there is a dispute. The report may be filtered on member status, rep status and agreement version date.
- Click Reports in the left-hand navigation panel.
- Type Privacy in the Search by Keyword text box.
- Click Search.
- Click the green arrow next to Privacy Policy / User Agreement Report.
- Select desired report criteria:
- Member Status
- Rep Status
- (Optional) Agreement Version: You will select an agreement version by the date it was created. Clear the None check box, then type the desired date in the <Chose Date> text box.
- Click View Report.


The report will include:
- Member ID
- Member Status
- Rep
- Rep ID
- Rep Status:
- Agreement Occurred on
- Agreement Version (version agreed to --Date and time of saved agreement copy)
- IP address
- Browser version
You may save the report in Excel or CSV format.
Staff/Employee Logins and Permissions
Our support team will provide your initial login name and password for a single staff person. Additional login names and passwords may be created at your convenience under Setup > Employees/Reps. Default address, phone number and email address information for each staff person are modified here as well.
You will assign a certain level of permission to your staff based on their need for access to financial information, administration tools and basic member information.
Receiving the highest permission level of Administrator gives the ability to modify any of the settings in your software – including the ability to add/remove other staff logins and assign different permission levels.
Staff Permission Levels
- Administrator: Staff/employee with all available rights in the software; full access to all financial and setup areas; able to add new database fields within the software screens
- Finance: Staff/employee with all rights except ability to modify Setup selections
- Standard User: Staff/employee with all rights except ability to modify Setup selections and access the QuickBooks or Billing menu.
- Standard User permissions still allow the ability to view invoice and payment activity on the members’ account.
- Disabled: Staff/employee with this permission level will not be able to login to the software.
Add New Staff Access
1. Click Setup in the left-hand navigation bar.
2. Click Association Employees/Reps in the Association Options area.

3. Click Add a New Rep.

4. Complete the Personal Information and Contact Information sections.
- Note: The Email Address recorded here should be the same email address that is used when accessing your own email program. If correctly specified, then using the options in software to "Email from Outlook" will not give an error. See Email Sending Options for more information.
- Note: The First Name and Last Name fields (with a space between the 2 fields) will be what displays in the “From” line in the recipient’s email inbox.

5. Click Save & Exit.
6. To create a login account for this staff user, click their name in the List of Representatives, expand the Permissions for... section and click Create Login Account.
7. Complete the Login Account and Database Permissions sections and click Save.

Note for Users of SmartCMS: A staff user's permission for SmartCMS are also configured in this section.
Note: To edit a staff user's email notifications, expand the Additional Settings For... section and select the desired options.
Set Email Notifications
- Click Setup in the left-hand navigation bar.
- Click Association Employees/Reps in the Association Options area.
- Click the name of the staff member you wish to set email notifications for.
- Expand the Additional Settings For... section, at the bottom of the screen.
- Select the desired notification options.
- Click Save.


Assign Staff User Name and Password
- Click Setup in the left-hand navigation menu.
- Click Association Employees/Reps in the Association Information section.
- Click the desired rep’s name in the List of Representatives area. The selected row will be highlighted in yellow.
- Scroll to the Permissions section.
- Click Create Login Account
- The Login Name will default to the user's email address, you can change this as needed.
- Enter a Password OR click the random password link to generate a password.
- Assign Staff Login permissions as described below.
- Click Save.
Update Staff User Name and/or Password
- Click Setup in the left-hand navigation menu.
- Click Association Employees/Reps in the Association Information section.
- Click the desired rep’s name in the List of Representatives area. The selected row will be highlighted in yellow.
- Scroll to the Permissions section.
- To change the staff member's user name, click use email. You can use the email address or change it as needed.
- To change the staff member's password, click edit password and enter a new password.
- Click Save

Assign Staff Login Permissions
- Click Setup in the left-hand navigation menu.
- Click Association Employees/Reps in the Association Information section.
- Click the desired rep’s name in the List of Representatives area. The selected row will be highlighted in yellow.
- Scroll to the Permissions section.
- Click the edit permissions link to select the desired permissions for this staff member. See Permission Levels for information on each permission set.
- Click Save.
Modify Staff Login Permissions
To change a login name, password and /or permissions for a staff/ employee:
- Click Setup in the left-hand navigation menu.
- Click Association Employees/Reps in the Association Information section.
- Click the desired rep’s name in the List of Representatives area. The selected row will be highlighted in yellow.
- Scroll to the Permissions section.
- Edit the Login Name, Login Password, Permission Level fields in the Permissions area as desired.
- Click Save.
NOTE: If this staff has login access to another ChamberMaster/MemberZone database or has a rep login/password on a member account, see Joining Login Names for more information.
Inactivating Staff
When a staff member leaves your chamber/association, you may remove or deactivate them in the database.
- Click Setup in the left-hand navigation menu.
- Click Association Employees/Reps in the Association Options section.
- Click the check-box next to the staff member you wish to de-activate.
- Click the Remove/Inactivate Reps.
- Select from the following options on the Remove Representative screen:
- Set rep as inactive and leave in current groups - select this option if you wish to deactivate the staff member, but allow them to continue participating in the groups they belong to.
- Set rep as inactive and remove from groups - select this option if you wish to deactivate the staff member and no longer wish them to belong to participate in groups. This will remove them completely from ALL groups. If you wish them to remain in some, but not others, you would need to add them back to specific groups in the Groups module.
- Set rep as inactive and inactivate in groups - select this option if you wish to deactivate the staff member and deactivate them in the groups to which they belong. Deactivating in a group allows you to keep them in the group, but they would not receive any of the email notifications sent to the group. that they belong to participate in groups. This will deactivate them completely from ALL groups. If you wish them to remain active in some, but not others, you would need to add them back to specific groups in the Groups module.
- Delete rep records and remove from groups - It is not recommended that you delete staff members as there is historical information maintained in the database that would be lost if you deleted the rep.
- Click Continue. The staff member will now be displayed as inactive in the List of Representatives.
| NOTE: The log-in credentials (user name and password) for the staff member are retained. However, Database Permissions and SmartCMS Permissions (if applicable) are disabled. |
Reactivating Staff
If a previous staff member returns to your organization, you may easily reactivate them. NOTE: If you have deleted the staff member completely, you are not able to simply reactivate him/her. You would need to add him/her back as a new staff member.
- Click Setup in the left-hand navigation menu.
- Click Association Employees/Reps in the Association Options section.
- Click the name of the staff member you wish to reactivate.
- In the Personal Information section, click the check box next to Rep is currently active with the chamber.
- In the Permissions section, click the check box next to Database Permissions and SmartCMS Permissions (if applicable).
- Click Save.
Working With Directories
QuickLinks
Directory QuickLinks are the main categories (displayed in bold) within your directory. Your software has been populated with the industry standard links. You may add additional QuickLinks as needed.

Add QuickLinks
- Click Setup in the left-hand navigation panel.
- Click Define Directory Categories in the Member Options section.
- Scroll to the bottom of the list of categories and click the QuickLinks Categories link.
- Scroll to the bottom of the list, and click the Add a New QuickLink Categories link.
- Enter a Name for the new quick link.
- Click Continue.


Add Images to your QuickLinks
Users of the v4 Public Modules can add images to the QuickLinks.
- Click Setup in the left-hand menu.
- Click Define Directory Categories in the Member Options area.
- Click the QuickLink Categories link at the bottom of the page.
- For the QuickLink to which you wish to add an image, click the Add Image link.
- Click the + sign to upload the desired image OR select one of the images provided in the software.
- Click Close.

|
|
NOTE: Only images for QuickLinks to which categories and members have been associated will display on your directory. |
View and Edit Directory Categories
|
|
See Add a Directory Category in Action! |
Add Top Level Directory Categories
Top Level Business Categories are used to group related members by their business type. Categories should be broad enough to encompass multiple members but specific enough that visitors can drill down to the member that they're looking for.
|
|
NOTE: If you are just getting started with the ChamberMaster/MemberZone software and you have provided directory categories, the GrowthZone support team will import your business directory categories and maintain their association with the designated member(s). On a go forward, these categories are under your control and may be modified at your convenience. After the initial import, it is also a great idea to double-check the categories and view the entire structure including sub-categories and associated QuickLinks, which may be new to your member business directory and thus may not currently be assigned. |
- Click Setup in the left-hand menu.
- Click Define Directory Categories in the Member Options area.
- A list of the categories you have currently defined for your organization will be displayed. Scroll to the bottom of the list and click the Add a New Top-Level Category.
- Enter the name of the category in the New Category Name text box.
- Select the Quick Link under which this category should be displayed. A Quick Link category should be assigned to every top-level and sub-category to take full advantage of all search methods available on the integrated public web site.
- Click Save Changes.


Assign Attributes to Directory Categories
You can add Category Attributes to any directory category to further identify the characteristics of your members.
For example, for restaurants, you could specify an attribute group called "Cuisine Type" with attribute tags of "Italian", "American", "Mexican", etc. and another group for "Average Entree" price. You Member Directory can then be searched by these attributes.
|
|
NOTE: Attributes will only display on the public website for those with 3.0 SEO website modules but staff with any website module version may enter and apply these to your members, allowing preparation of your member data prior to upgrading to the 3.0 modules.
Not sure which version you have? Select "View Website Integration Instructions" from your Dashboard. Your module version will display in the heading at the top of the screen. Contact Customer Support for assistance or with questions. |
To setup attributes for your categories:
- Select Setup in the left-hand navigation panel.
- Click Define Directory Categories in the Member Options section.
- For the desired category, click the add attributes link in the Attributes column.
- Click Add Group. A group which will contain similar attributes must first be created. For Example: You can create a group called price, then add '$', '$$', '$$$' attributes.
- Enter the name of the group in the New Group Name text-box.
- Click the green check-mark to save the new group.
- To add attributes to the group, click the + sign next to the name of the group.
- Click the Add button.
- Enter the name of the attribute in the New Attribute Name text box.
- Click the green check-mark to save the attribute.
- Repeat steps 6 - 8 above to add additional attributes.
- Click Close when all attributes have been added.


Assign Directory Attributes to Members
If category attributes have been added to a business category, then they may be assigned to your member on the Advanced tab. Attributes allow online directory visitors to narrow their search for your members within the specified category.
- On the member's Advanced tab, click the new window symbol that follows the category name.
- Click the + sign on the desired attribute group to view the available attributes. If no attributes are available, you will see a message “There are no attributes available for this category”. Create attributes under Setup-Define Business Categories.
- Click the checkbox in front of the desired attribute.
- Click Close.
This member will now return in the online directory search results when the selected criteria is searched.
|
|
NOTE: Attributes will only display in the online directory for those with 3.0 SEO website modules, but staff with any website module version may enter and apply these to your members, allowing preparation of your member data prior to upgrading to the 3.0 modules. |
Note: Attributes will only display in the online directory for those with 3.0 SEO website modules, but staff with any website module version may enter and apply these to your members, allowing preparation of your member data prior to upgrading to the 3.0 modules.
MarketSpace Categories
MarketSpace categories display in the search section of the MarketSpace public module.
- Click Setup in the left-hand menu.
- Click Define Business Categories.
- Select the MarketSpace checkbox in the row of the desired category that should be displayed as a MarketSpace category.
- Note: If the MarketSpace name has been changed, then the checkbox title may not be MarketSpace. Look at the title used in the left-hand menu to determine the title of this column.
- Note: If selecting a main-level category as a MarketSpace category, then all the sub-categories will display as MarketSpace categories also.
- Click Save.
Printing Business Category Reports
Print List of Categories
- Click Setup in the left-hand navigation bar.
- Click Define Business Categories in the Member Options section. area.
- Click Print at the bottom of the category list.
- The category list will display on the screen.
- Select Print from your browser software. Use standard procedures to print the report.
Print List of Members & Associated Categories
- Click Reports in the left-hand navigation bar.
- Click Membership in Search by Category
- Click Membership Directory Report.
- Click Contact Information in the Available Fields list.
- Click the check box(es) for the fields you wish to include in your report.
- Click Group members by Category in the Extended Options area (if not already selected).
- Click View/Print Report.


The report will display on the screen. Select Print from your browser software. Use standard procedures to print the report.
Membership Types
Membership Types are used throughout the software once defined and assigned to your members. Some common uses of Membership Type:
- Reports may be viewed/generated by Membership Type
- Communication may be sent/created by Membership Type
- Event invitations may be sent by Membership Type
- Discounts may be created based on Membership Type
Once created, membership types may be associated to your membership packages, or assigned directly to a member on the member's General Information tab.
Define Your Membership Types
- Click Setup in the left-hand menu.
- Click Define Membership Types
- Click Add New Type
- Enter the name of the new Membership Type.
- Click Save
- Click Continue.


Display Membership Icon on your Directory Pages
If you are using the v3 public modules, and you have Plus Edition or greater, you can display a membership icon next to members' name in your on-line directory.
- Click Setup in the left-hand menu.
- Click Define Membership Types
- Click the set icon button.
- Click Choose File to navigate to the desired .jpg or .gif file. Maximum graphic size is 30 x 12 pixels.
- Click Upload Image.
- Once the file is displayed in the Load Image dialog box, click Close.
Display Membership Type Banner for Your Members on your Directory Pages
If using the v4 public modules, you can display a membership type banner for your members on the directory pages.
- Click Setup in the left-hand menu.
- Click Define Membership Types
- For the desired membership types, click the check-box in the v4 Display column.
- Click Continue.
Assign Membership Type to a Member
- Click Members in the left-hand menu.
- Select the desired member from the drop-down menu.
- On the General tab, click the Membership Type arrow in the Additional Information area to select the desired Membership Type.
- Click Save.

Member Information Center Setup
Your members have a secure password-protected Member Information Center available through the Internet where they can view and edit their company information which automatically updates the public member listing on the your website, pay bills, interact with each other, submit jobs, advertising, and events for approval, and also view statistical reports. This Member Login area may be customized by you using menu selections in the Setup module.
Customize the Member Information Center
The selections made here determine the permissions that are available for all member logins and also set the maximum permissions allowed for all rep logins, if individual rep logins are used.
- Click Setup in the left-hand menu.
- Click Member Login Area Options & Settings in the General Information area.
- Click the Permissions tab.
- Select Enable for selections that should appear on the Members’ menu, and select Disabled for selections that should not appear.
- Click Save

Define which Menu Options/Functions are Available in the MIC
Under the Member Login Area Options & Settings, you will be able to define which options you wish to include in the MIC. For Example, if you are not using Hot Deals or Job Postings, you can disable these options and they will not display for selection in the MIC.
- Click Setup in the left-hand navigation panel.
- Click Member Login Area Options & Settings in the Association Options section.
- Click the Permissions tab.
- For each available MIC menu option, you can select:
- Enabled: Select enabled to display the functionality in the MIC.
- Disabled: Select this option if you do not wish to display the functionality.
- Read/Write: Select this option if you wish to allow your members to view and edit the option. For example: If you wish your members to be able to update their Business Categories, select read/write.
- Read: Select this option if you with your members to view the option, but not edit it.
- Click Save.

|
|
NOTE: The Permissions settings only define what can be available to your members in the MIC. The permission level assigned to your representatives will ultimately provide them access to the functions. See Setup Login Permissions for further information. |
Control members access to other member email addresses in the MIC
- Click Setup in the left-hand menu.
- Click Member Login Area Options & Settings in the General Information area.
- Click the Settings tab.
- In the Email Addresses area, select how you’d like the email addresses to appear for member and reps in the Member Information Center.
- Click Save.

Create your own Menu Selections for the MIC
- Click Setup in the left-hand menu.
- Click Member Login Area Options & Settings in the General Information area.
- Click the Menu Items tab.
- Click Add/Edit Menu Section 1 (or Add/Edit Menu Section 2 or Add/Edit Menu Section 3). Each section represents a separate section of the menu displayed in the Member Information Center.
- Enter a name for the new section in the Place custom menu items under the heading text field.
- Click Save.
- Click Add a New Link.
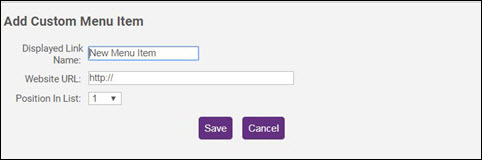
- Displayed Link Name - enter the name or text you would like to display for the hyperlink.
- Website URL - enter the url for the website to which you wish to link.
- Click Save.
- Click Continue.


Customize the MIC Home Page Welcome Message
- Click Setup in the left-hand menu.
- Click Member Login Area Options & Settings in the General Information area.
- Click the Messages tab.

- Click Use Custom.
- Click Edit.
- Make desired changes to the text.
- Click Continue.
- Click Save.
|
|
NOTE: You can return to the default text at any time by clicking Use Default and then click Save. |
Enable and Customize Promote Your Business Widget in MIC
The Promote Your Business widget will display in Member Information Center (MIC) for those that have a Basic Web Participation package to encourage Basic package members to upgrade to an Enhanced Web Participation package. You can enable/disable the widget and control the message that appears with the widget.
|
|
MIC Version 4: Promote Your Business and Upgrade Your Listing widgets appear on the Company Information->Profile Summary page. |
The Upgrade your Listing widget may also appear and be controlled by this setting depending your benefit campaign arrangement with GrowthZone (if any).
Enable/Disable the Promote your Business and the Upgrade Your Listing Widget
- Click Setup in the left-hand menu.
- Click Member Login Area Options & Settings in the General Information area.
- Click the Permissions tab.
- Click the Enabled/Disabled selection in the Display Upgrade Message drop down.
- Click Save.

Edit the Message on Promote Your Business and the Upgrade Your Listing Widget
- Click Setup in the left-hand menu.
- Click Member Login Area Options & Settings in the General Information area.
- Click the Messages tab.
- In the Promote your Business section, click Use Custom.
- Click Edit.
- Make desired changes to the text.
- Click Continue.
- Click Save.

Note: you can return to the default text at any time by clicking Use Default and then click Save.
Determine the Email Recipients of Promote Your Business and the Upgrade Your Listing Widget
- Click Setup in the left-hand menu.
- Click Member Login Area Options & Settings in the General Information area.
- Click the Messages tab.
- Type the email addresses of the desired recipients of those that submit a request to "promote their business.”
- Click Save.
Note: you can enter multiple email addresses separated with a semi-colon.
Customize Forgot Password Error Message
The error received by members and reps that click Forgot Password and incorrectly enter their login credentials may be given a customized message that will give detailed instructions.
- Click Setup in the left-hand menu.
- Click Member Login Area Options& Settings in the General Information area.
- Click the Messages tab.
- Click Use Custom.
- Click Edit.
- Make desired changes to the text.
- Click Continue.
- Click Save.

Note: you can return to the default text at any time by clicking Use Default and then click Save.
Customize the Member Information Center MIC Help
The MIC Help is pre-populated with several videos which you may use as designed, or you may replace with videos and help text of your own.
- Click Setup in the left-hand menu.
- Click Member Login Area Options & Settings in the General Information area.
- Click the MIC Help tab.
- Click Use Custom on either Help Item 1 or Help Item 2.
- Click Edit.
- Make desired changes to the text.
- Click Continue.
- Click Save.

Note: you can return to the default text at any time by clicking Use Default and then click Save.
Customize the Member Information Center MIC4 Search
Member Information Center version 4 has powerful search ability in the member directory. Customize what options and filters display and whether include reps in addition to the members in the search results.
Customize MIC Version 4 Search Results
- Click Setup in the left-hand menu.
- Click Member Login Area Options & Settings in the General Information area.
- Click the Settings tab.
- Select the desired filters and search result options.
- Click Save.

Enabling your QuickLinks in the MIC search will display in the MIC as Categories. Then your Categories will be labeled as Subcategories, making it easier for members to understand the hierarchy.

New Members filter displays a checkbox where those searching would see those with a Join Date of today or 30 days prior.

Selecting Yes for Display Representatives in Search Results will display only members in your MIC Directory instead of both members and rep names. If set to No, Rep names and information may still be viewed when accessing the member details page but now the rep names and member names don't have to mingle in the directory.
Customize the Member Information Center Features Available
- Click Setup in the left-hand menu.
- Click Member Login Area Options & Settings in the General Information area.
- Click the Settings tab.
- Select the desired additional features or enable/disable the Community Activity Feed.
- Google Translate makes it possible displays the Member Information Center in the language selected by the viewer. Enabling this selection displays the Translate button on-screen.
- Member to Member Reviews enables ability for members to rate and reviews each other if desired. Note: No automatic staff notifications when reviews are posted at this time.
- Social Logins allow members to login with their social login. If disabled, this removes the social login option from your /login page.
- Allow Enhanced Content for all Members - enables the enhanced web display listing for all members.
- Request for Proposal Module turns on/off the Request for Proposal menu selection from display in the Member Information Center.
- Click Save.

Social Network Publishing
ChamberMaster will automatically publish your Events, Hot Deals, News Releases, New members, and Job postings to Twitter and/or Facebook for those that have upgraded to the Premier Edition or greater and have an account on any of these social networking sites.
See Social Network Publishing for further details.
Customizable Menu selections
|
Field Name
|
Used in what Module
|
Description
|
Where to edit
|
|
Sales Stage
|
Members
|
Designed to track the progress of a prospective member toward active status; may be used in any way desired
|
Members->General tab->edit stage options in the Additional Information area
|
|
Drop Reason
|
Members
|
Selected when completing the drop screen that appears when a member status is changed to Dropped.
|
Setup->Member Drop Reasons
|
|
Task
|
Communication and various locations
|
A Task may be selected when sending an email or creating a Communication entry. It identifies (for internal use) the subject or category of the correspondence that is being created. All communication may be filtered by Task to view communication across all members that relate to one topic (Task).
|
Setup-> Correspondence Categories
|
|
Event Category
|
Events
|
Assigned to an event so events may be displayed and searched for by their type on the public website.
|
Setup->Event Calendar: View/Edit Event Types
|
|
Group Type
|
Groups
|
Assigned to a group so groups may be displayed and searched for by their type in the Groups module; helps organize the multitude of groups that may be created.
|
Setup->Define Group Types
|
|
News Release Article Type
|
News Releases
|
Optional: Used to organize News articles on the public website. Article type is not displayed for the public but allows web designers the ability to display news by type if desired.
|
Setup->News Release Article Types
|
|
Custom fields - Members
|
Members – General tab
|
Used to store any information desired on a Members’ record. Chose from Text, Date, Drop-Down list, Boolean, and Numeric field types. These fields are available on each member’s record, on custom reports, and within custom communication as mail merge fields.
|
Members->General tab, Add/Edit Custom Fields in the Custom Fields area
|
|
Custom fields - Reps
|
Members ->Reps tab
|
Used to store any information desired on a Reps’ record. Choose from Text, Date, Drop-Down list, Boolean, and Numeric field types. These fields are available on each rep’s record and on custom reports.
|
Members->Reps tab, Add/Edit Custom Fields in the Custom Fields area.
|
Customize the Website Modules
Customize your Event Settings
See Configure Global Event Settings.
Modify Business Directory Control Panel
Making Changes
- Click Setup in the left-hand menu
- Click Directory Control Panel
- Make the desired changes
- Click Save

Description of Commonly Modified Selections
- When this selection is enabled, website visitors will see links to share the listing/posting on FaceBook, Twitter, LinkedIn or email to a friend. Share links will appear on the member’s website Information Page, Hot Deals, Member-to-Member deals, job postings, MarketSpace items, and on event description pages. Note: This selection is only available when your website has been integrated with the SEO module integration.

Filter by Contact Options
- Select whether individual representative names should be used as search criteria in the online Directory search. See options below in Figure 2. If this selection is enabled, then the General Filter Options: Contact will also be selected. Note: This selection is only available when your website has been integrated with the SEO module integration.

- Figure 2: Filter by Contact Options

Filter by Location (Filter by Geographic Proximity)
- When the Directory is searched by zip code proximity, member names will now display a distance from that zip code after their member name. Note: Miles will show for all US associations and kilometers will display for all others

Contact Businesses Button
- When this checkbox is selected, website visitors will have an option to Contact these Businesses when viewing a list of members in the online Directory, whether searching alphabetically, by category, keyword or any other way. This single message is sent via email to the selected businesses. Each request is tracked in the database as an eReferral, just like any eReferral form completed by your internal staff. Use with Require Staff Approval Before Delivery checkbox if you’d like to approve the message before it is sent.
Require Staff Approval Before Delivery
- Select this checkbox if you’d like to approve the Contact These Businesses message before it is delivered to the member. When a lead is received it will appear in the Web Leads Task List.
Modify Hot Deals Settings
1. |
Click Setup in the left-hand menu. |
2. |
Click Hot Deal Settings in the Information area. |
3. |
Make desired selections. |
4. |
Click Save. |

• |
Deals may be set to auto-approve (without your intervention). This selection to auto-approve deals is chosen by you under Setup->Member Login Area Options and Settings. Select to Enable “Auto-Approve Hot Deals “ |
• |
Display icons in summary list will show the graphic that has been selected in that deal on the public website in the search results in addition to displaying on the coupon itself. Only available with SEO integration. |

• |
Hot Deal and Member to Member captions allow you to specify your own custom phrase to describe these deals. The custom title will be reflected on the associated public website modules and throughout the software. Website graphics must be designed and replaced by your website designer. Refer to http://kb.chambermaster.com/hot-deals-icon for complete details. |
• |
RSS Feed limits for deals and member to member deals determine how many deals will display at one time in the RSS feeds. RSS feeds are commonly used to display a easy-glance list on your website home page. |
• |
Enable Hot Deals Newsletter displays the consumer signup link on the Hot Deals website page. |
• |
Enable Hot Deals as a public module and Enable Member to Member Deals as a public module control whether the link appears at the bottom of the modules on the public website. If deselecting the Member to Member Deals as a public module, you can still select Allow users to add M2M Deals while public module is disabled so that members may add deals in the Member Information Center but not have the link display for the public. |

• |
Charging for deals is an option. If wanting to charge, the options of credit card payment (if integrated) and invoicing are available. A fee item (Type=Member Due) must be created in the Billing or QuickBooks module in order to have the Fee Item selection available here. |
• |
The fees selected here apply to both Community Hot Deals Deals and Member-to-Member Deals. |
• |
The Item Price option for Enhanced Package Members will only apply if you have purchased the Marketing Package. |
• |
If applicable, a fee will be charged per deal for the number of weeks the posting will be displayed. |
|
When credit card is integrated with your database, it will always be available as a payment method for deals. It may not be removed as a payment method at this location. |
|
Invoicing may be turned off by de-selecting the checkbox “Enable invoicing as payment option for Hot Deal purchases.” |
|
Cash payment is not available as a payment method for deals. |
|
Fees for deals are charged on a week by week basis – a full week at a time. The week is determined by the number of days – 1-7 days = 1 week; 8-14 days= 2 weeks etc. |
Modify MarketSpace Settings
1. |
Click Setup in the left-hand menu. |
2. |
Click MarketSpace Settings in the Association Options area. |
3. |
Make desired selections. |

4. |
Click Save. |
The Default Priority determines the level that MarketSpace items will be assigned when an item is submitted by a member or as the default selection when items are created by staff. Available priority levels are Normal, Silver, Gold, or Platinum. The level assigned to the item determines the order it will display on the public website. |
A fee item (Member Due) must be created in the Billing or QuickBooks module in order to have the Fee Item selection available here. |
A fee may be charged per MarketSpace for the number of days the posting will be displayed. Type the price per week here which will automatically calculate a price per day when needed. The payment method for each MarketSpace item may be selected as Invoice or payment by credit card (if integrated). |
When credit card is integrated with your database, it will always be available as a payment method for MarketSpace items. |
Cash payment is not available as a payment method for MarketSpace items. |
MarketSpace items may be set to auto-approve (without your intervention). |
The More Pricing option that includes a different price for Basic Package Members vs. Enhanced Package Members will only apply if you have purchased the Marketing Package. |
Caption: See “Customize MarketSpace Name” in the MarketSpace section of online help. |
Credit Card Processing
With ChamberMaster/MemberZone Plus, Premier or Pro editions you have the option to accept credit card payments for event registration, online membership applications, and payment from members within their Member Information Center.
![]() Watch an overview of the Credit Card processing setup and places it is used. About 18 Minutes
Watch an overview of the Credit Card processing setup and places it is used. About 18 Minutes
Requirements
- Must have Plus, Premier or Pro editions of ChamberMaster/MemberZone. Look in the upper left corner of your database to see what version you have and contact support if you need to look at upgrading.
- You must use the Integrated Payment Processing embedded in your software, or have a credit card processing gateway that is compatible with our system:
- Authorize.net
Note:Authorize.NET Direct Payment Method is now supported. With DPM the consumer’s credit card information is transmitted from their browser to Authorize.NET’s servers. This will significantly help those in the process of getting PCI certification. - Beanstream/Bambora (and Canadian customers of First Data)
- PayPal Website Payments Pro
- Any Gateway that supports an AIM Authorize.net Gateway Emulator
- PayPal Standard
- Limited Functionality with the PayPal standard option
- Authorize.net
Getting Setup
Contact our support team and we'll get your processing enabled so you can complete the setup.
Using the Credit Card Processing
![]() Watch an overview of the Credit Card processing setup and places it is used. About 18 Minutes
Watch an overview of the Credit Card processing setup and places it is used. About 18 Minutes
View detailed information about using credit card processing in specific areas of your database.
- Setup Events to Allow for Online Payments

- Setup and Processing Online Credit Card Payments for Membership Applications
- Member Bill Pay
- Automatic Recurring Credit Card Billing and ACH with Integrated Payment Processing
- Automatic Recurring Credit Card Billing and ACH with Authorize.Net
- FAQs on automatic epayments, recurring credit card and ACH billing
- Reports to support these credit card transactions are also available.
- Setup Events to Allow for Online Payments
Internet Fax Service
Without any additional selections, ChamberMaster gives options to save your fax output to a file that is accepted by fax software that you might already have installed, like WinFax Pro. Another option prints the output in a format ready to send with your traditional fax machine. These selections are available under Communication->Form Letters.
- Figure 1 – Standard fax options in ChamberMaster
Additional selections may be configured to send your communication piece directly through ChamberMaster via email to your email fax service. (*Note: This requires a separate subscription with one of many well-known internet fax service.) Once ChamberMaster is configured to use your email fax service, faxing your communication can be completed without printing, downloading, or manually faxing. A new selection will be available under Communication->Form Letters.
- Figure 2 – Sample of the Send Faxes button when using eFax
What is an email fax service?
Configure ChamberMaster/MemberZone to use my email fax service

Which email fax services are supported?
Miscellaneous Settings
There are a variety of custom settings that may be put in place. Most of these selections are found by clicking Setup in the left-hand menu. A few miscellaneous selections are identified here.
- Enable LiveEdit button
- Enable Constant Contact synchronization
- Upload your logo
Constant Contact Synchronization
The ChamberMaster/MemberZone member management system allows you to connect to your Constant Contact account to automate updates to your Constant Contact lists based on updates made in the database. Once configured representatives that have been added to the database or specific groups will automatically be added to Constant Contact. Any reps that are disabled within in a group will be removed from their respective lists.
- Note: Any Representatives that are deleted from the database or removed from a group will still remain in Constant Contact. These contacts would need to be manually removed from Constant Contact in these circumstances. For best results avoid deleting or removing representatives within your database and instead simply disable them within the group.
Constant Contact has a special pricing program for Chambers of Commerce see the details here.
Enable Constant Contact Synchronization
You must have an active account with Constant Contact to setup and use the synchronization tool.
- Login to your database with administrator privileges.
- Click Setup in the left-hand menu.
- Click General Options and Settings in the Association Information (or Chamber Information) area.
- Select ConstantContact from the Newsletter Solution drop-down box.
- In the Add-On Manager area click the blue link Please click here to authorize the Constant Contact connection.
- Follow the prompts to authorize the database with your Constant Contact account.
- Choose which items you would like to have automatically synchronize each night. Automatically synchronize membership types daily, Automatically synchronize groups daily, and/or Automatically sync all active reps for active and courtesy members to allow ChamberMaster to pass all ChamberMaster Membership Types, active reps and/or Group updates and additions nightly to your Constant Contact account. To select only specific groups, click the Synch tab in the Groups module.
- If you’d rather select only certain groups to be synched, then you’ll need to deselect all others on the Synch tab in the Groups module. See Selecting Which Groups to Synchronize below for more info.
- Click Save.
- Going forward, make any additions to these list or changes to contact information in your software. Each night a synch takes place and any added reps will be added. Any reps disabled will be removed. If a rep is deleted from the database they will not be removed. For best results, manage all additions and updates in ChamberMaster/MemberZone only and don't delete any records.
- Note: Reps that have unsubscribed from your database mailing list will not be included in the synch to Constant Contact.
Selecting Which Groups to Synchronize
Once the Constant Contact synchronization is setup you will be able to configure which groups are set to be synchronized each night.
- Note: The groups option must be checked off in step #7 above for any groups to synchronize.
View & Remove Groups from the daily synchronization
- Select the Groups module.
- At the top, select the Synch tab.
- All Groups currently set to synchronize will be displayed in a list when you first open this tab.
- Uncheck any that you wish to stop Synchronizing and then click Save
Set a group to start synchronizing each day
- Option 1 - From the general tab
- Select the Groups module.
- At the top select the Home tab.
- Click on the group name that you'd like to change the setting for.
- Check the box to "Synch this group with Constant Contact."
 Additional Options for Groups
- Click Save Changes
- Option 2 - From the Synch tab
- Select the Groups module.
- At the top, select the Synch tab.
- Uncheck Display groups set to synch only.
- Check off the groups you wish to synchronize.
- Click Save

Synchronize a Group Now
- Select the Groups module.
- At the top select the Synch tab.
- Next to each group that has the synch enabled you can click the Synch Now button.
- This will initiate a synch process that will take up to 15 minutes to complete on Constant Contact's end. You can view the Activity report on Constant Contact to see the status of the import.
Manually Export Contacts to Constant Contact
You can manually create a contact list and export it to Constant Contact as well.
If automatic synchronization is not being used, or if manual exporting/updating is desired, use the steps here to export ChamberMaster/MemberZone contacts so that they may be directly imported by Constant Contact.
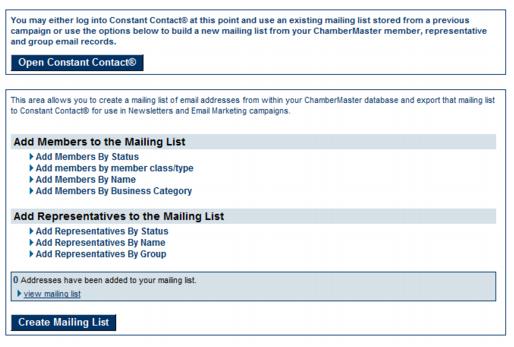
- Click Communication in the left-hand menu.
- Click Newsletters / Email Campaigns.
- Click the desired “Add” selection to mark names to be exported.
 Selecting information to be exported
- A summary of your selections will appear in the blue box at the bottom of the screen. Click view mailing list to see your results.
 Summary of selections
- Remove any recipients that are not desired by clicking the checkbox in front of their name. Then click Remove Selected Items.
 Removing un-desired recipients
- Click Continue.
- Repeat steps 3-6 to add any more desired recipients.
- Click Create Mailing List when all names have been selected.
- The Database will allow you to download and save these names in a file that may be imported into Constant Contact. Follow instructions on the screen to save the file with your desired name and location. Remember this name and location for importing into Constant Contact.


FAQ
- Why are there fewer contacts in my Constant Contact list than what is showing in my database?
- A) When the data is pushed over to Constant Contact any emails that are invalid are automatically excluded. Any emails that are unsubscribed within Constant Contact would also be excluded from the final list in Constant Contact.
- When does the synch happen each day?
- A) The synch happens between 11pm and 4am Central Standard Time daily.
- What happens when I change a representatives email in ChamberMaster/MemberZone?
- A) The representative will be added to anything their previous email was attached to but their previous email will not be removed. If you want their previous email removed you would need to do that directly within Constant Contact.
Upload your logo
Your association logo will appear at designated areas throughout your integrated website and in the Member Information Center if you have it uploaded. If using Integrated Billing, it will also display automatically on default Invoice templates.
- Click Setup in the left-hand menu.
- Click Organization Information.
- Click the + (plus sign) in the Business Logo area.
- Click the + (plus sign) to browse your drive for the desired image.
- Note: The folder path that is displayed here is not significant and is not accessible at this time at any other location in the software. Future plans are that these images should be accessible at a common location so they can be used throughout the software. This folder is not visible in the Cloud Drive at this time. You are not able to navigate up to any other folder from this location.
-
- Once you’ve selected (clicked) the desired image, click Upload.
- Click OK on the successful message.
- Click the desired image Name in the list.
- Click Select.
- Position the selection window around the area of the image that you’d like displayed.
- Click Crop & Save.
- Click Save Changes.
Enable Votility Integration
• |
A more seamless expirience for your members by giving them access to Votility directly through the Member Information Center without them ever needing to create a separate login or account on Votility. (require Member Information Center v4) |
• |
Additionally, you can sign directly into your Votility Administrator account from the Dashboard without needing to enter additional credentials. |
1. |
To find this information and integrate with Votility, log into your Votility enterprise management. |
2. |
Use the navigation links on the left to find the "API Settings" page. |
3. |
From that page, copy your Organization ID and API Access Key. |
4. |
Login to your ChamberMaster/MemberZone database with Admin level permissions. |
5. |
Click Setup in the left-hand menu. |
6. |
Click General Options and Settings. |
7. |
Open the Add-On Manager area. |
8. |
In the Votility Integration Settings section, paste the copied Organization ID and API Access Key from the Votility software screens into these boxes |
9. |
Click Update Votility Integration Settings button. |

10. |
This will complete your integration, enabling a link to Votility in the Member Information Center for your members and an Administrator login link on the backoffice Dashboard. |


Help Documentation
Browse the Admin Tasks Table of Contents