Events
Contents
- 1 Getting Started
- 2 Get the Big Picture
- 3 Maintaining the Events Calendar
- 4 Event Fees and Billing
- 5 Sponsors
- 6 Guest List
- 7 Reports and Labels
- 8 Customize Online Event Calendar Display and Registration Options
- 9 FAQ
- 10 Common Tasks
- 11 Help Documentation
Getting Started
If you are just getting started with the Events module, watch this overview video and read Get the Big Picture.
Otherwise, just scroll down for FAQ, Common Tasks, and this module's Help Documentation.
Get the Big Picture
- Events added to your calendar may be enhanced to include photos, sponsor logos and information, website links, and event description text that can be formatted as desired. Options also include online participant registration, special members only pricing, and an automatic email reminder to registered guests.
- Event information may be kept for internal purposes only, displayed on the public website calendar, and/or a calendar available only to chamber members. The public events website displays a graphical monthly calendar, a list of current events, all events for the month, chamber-designated Featured Events, and the ability to search for desired event by category, keyword, or month. A printable listing is also available that contains all pertinent event details.
- Invitations may be sent to potential participants and then automatically displayed on the participants list where their status may be changed from Invite Sent to Registered as RSVPs are received. From the participants list a roster sheet, name tags, or labels may be printed. Other output options include sending emails and downloading data to a comma separated value (.csv) file. Using a variety of filter options all output can be displayed by registration status, payment status, or according to self-selected filters.
- Note: When creating a new event, work with the tabs in order as displayed. For example, after completing the General tab, setup the fees (if applicable) on the Fees tab. The Sponsor tab would be next, the Guest List, and finally the Account tab. You may complete them out-of-order if desired but there is a logical flow if working from left to right.
- Event fees, designated for members or non-members, may be associated with each event. Individual invoices may be generated from the Events module for those requesting an invoice, and if credit card processing is set up then invoices/payments or sales receipts can be recorded automatically upon successful registration.
Maintaining the Events Calendar
Understanding the basics of how the Events module is organized will give a foundation for operation. Viewing existing events and learning to display only desired events will also be helpful. Then learn how to create, modify and manage events.
- Event module organization
- Working with the Calendar Tab
- Selecting an event
- Adding an event
- Editing event information
- Create a recurring event
- Placement options
- Deleting an event
- Syncing with your calendar
Event Module Organization
Event Tabs
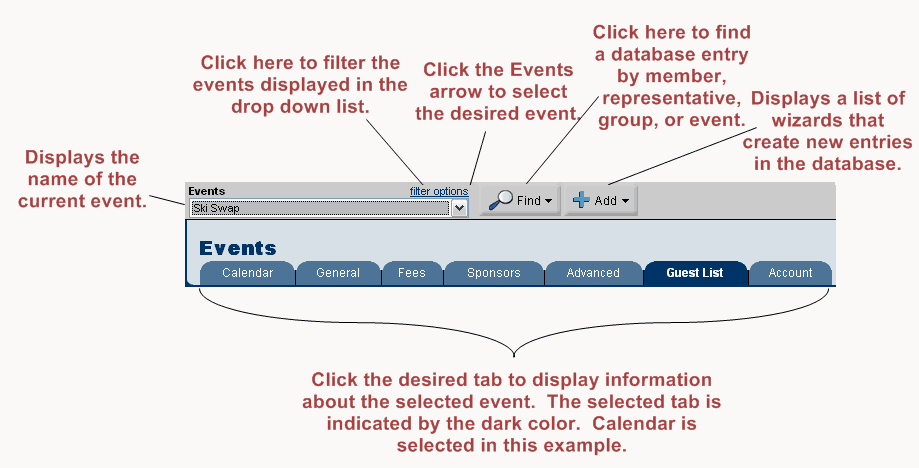
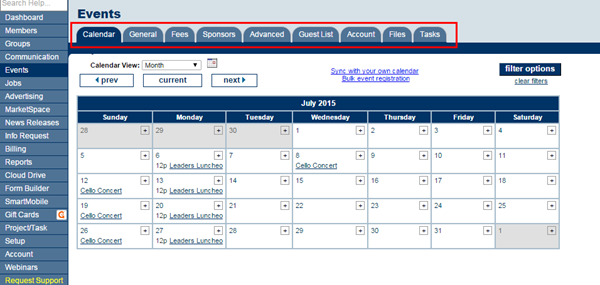
Within the Events Module there are nine tabs: General, Fees, Sponsors, Advanced, Guest List, Account, Files, and Tasks.
Calendar: Displays the internal events calendar in one of five views: list, day, month, week, or year view. Filter options may also be selected which would display only user-selected events. New events may be added from this tab by clicking the + sign on the desired date/time
General: Event information, placement options, and photos and images
Fees: Assign event fees, billing preferences, and discounts based on age, date, or volume
Sponsors: Designate event sponsors, logos, fees
Advanced: Specify Locations (if available) and Custom Fields
Guest List: Send invitations; add guests to the roster; print roster sheet, labels, and name tags; send emails; register invitees
Account: View income and payment activity, generate invoices and sales receipts (if applicable)
Files:
Tasks: 'Integration with the Project/Task Manager (Pro edition only) When creating a new event, work with the tabs in order as displayed. For example, after completing the General tab, setup the fees (if applicable) on the Fees tab. The Sponsor tab would be next, the Guest List, and finally the Account tab. You may complete them out-of-order if desired but there is a logical flow if working from left to right.
Working with the Calendar Tab
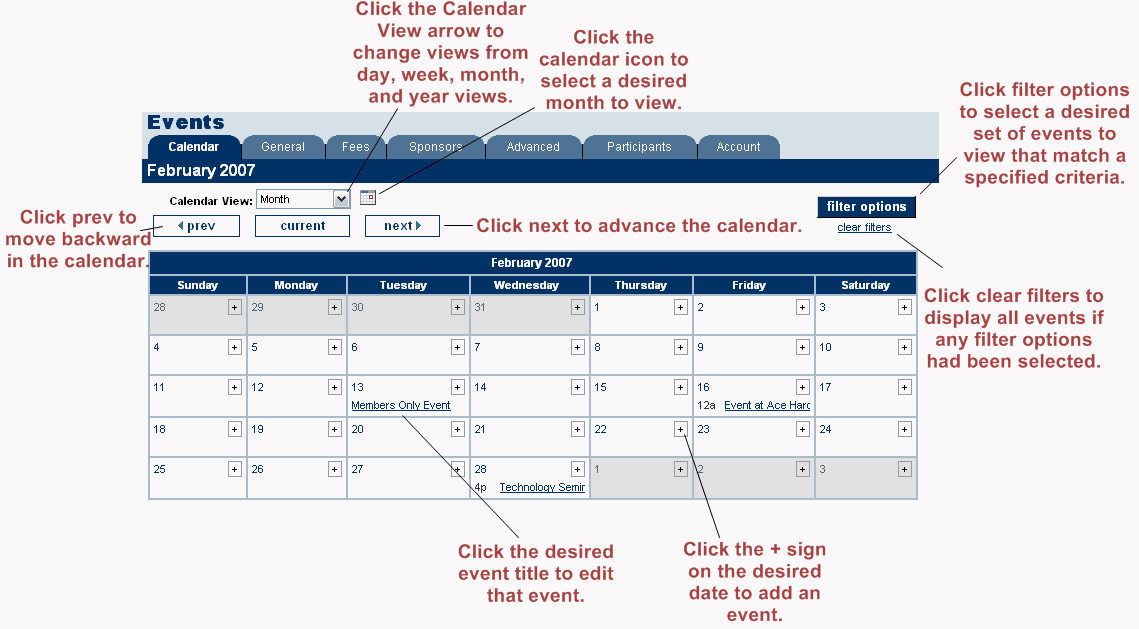
The Calendar tab displays an Events calendar that may be displayed in five different views: list, day, week, month, and year view. As the name suggests, List view displays all events in a list format. The day, week, and month view will display all events falling within the specified date range. The year view displays a graphical calendar allowing chamber employees to advance quickly to a particular date.
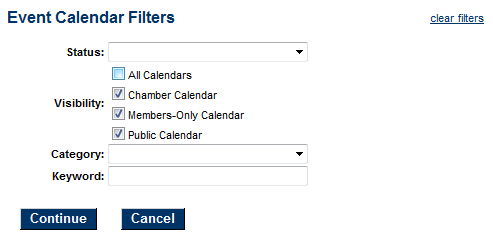
The calendar may also be filtered to display only certain events matching the desired criteria. Click clear filters to display all events again.
View the Internal Events Calendar
1. |
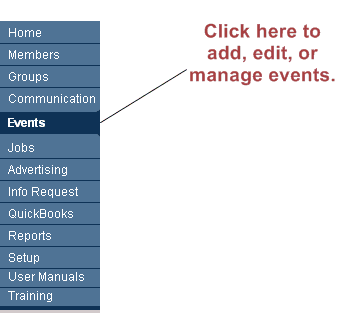
Click Events in the left-hand menu. |
2. |
On the Calendar tab, click the Calendar View arrow to select the desired view. |
3. |
If necessary, click Prev and Next to decrease or advance the calendar. Alternatively, you may click the calendar icon and select the desired month to view. |
Filter the Internal Events Calendar (display only specified events)
2. |
Select the desired filter options. See Figure 2-4 and Table 2-2 below. |
3. |
Click Continue. |
4. |
When finished viewing the filtered list of events, click clear filters to view all events. |
Event Calendar Filters
Selecting an Event
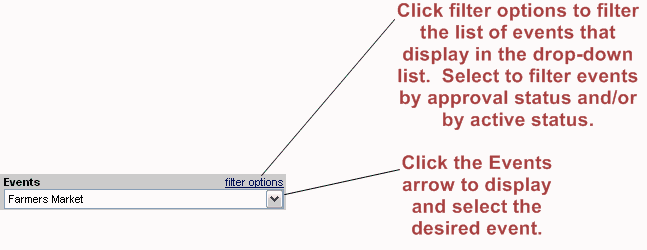
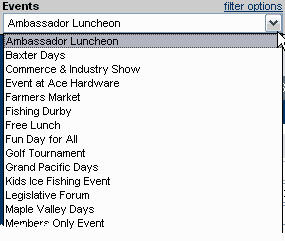
Select an Event Using the Drop Down List
1. |
Within the Events module, click the drop-down arrow to the right of the Event name. See Figure 2-6. |
2. |
In the Events list, click the desired event name. |
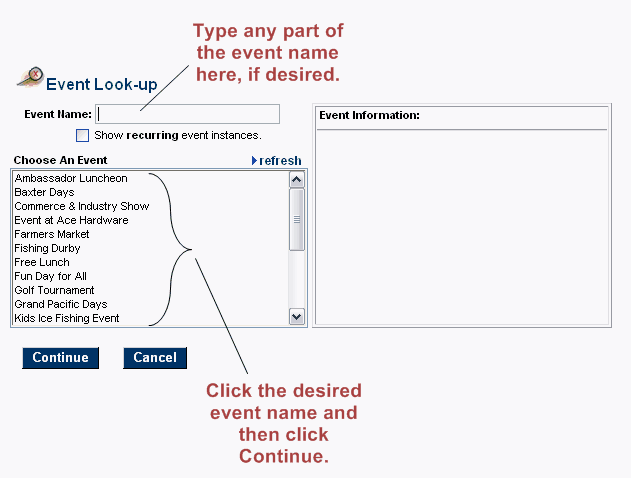
Select an Event Using the Find Button
1. |
On the Find menu, click Event. |
2. |
If desired, in the Event Name box, type any part of the event name. (This will limit the list of displayed events to those matching your criteria.) |
3. |
In the Choose an Event list, click the desired event name. |
4. |
Click Continue. |
Select an Event Using the Calendar View
1. |
In the Events module, click the Calendar tab. |
2. |
Advance the calendar to display the desired event. |
3. |
Click on the desired event title. |
Adding an Event
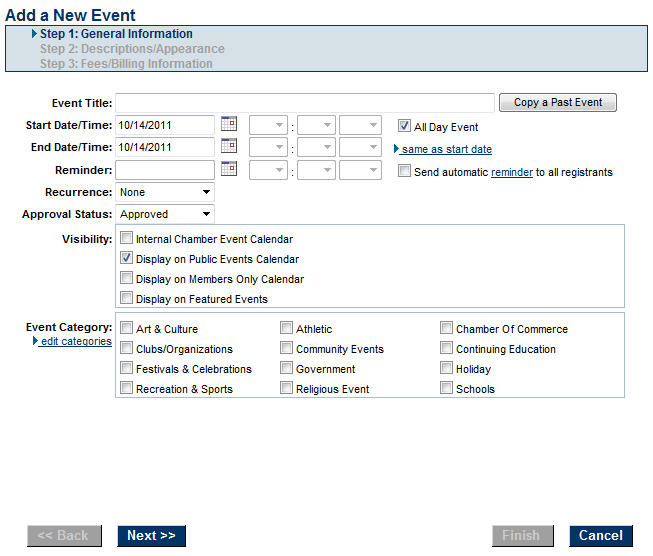
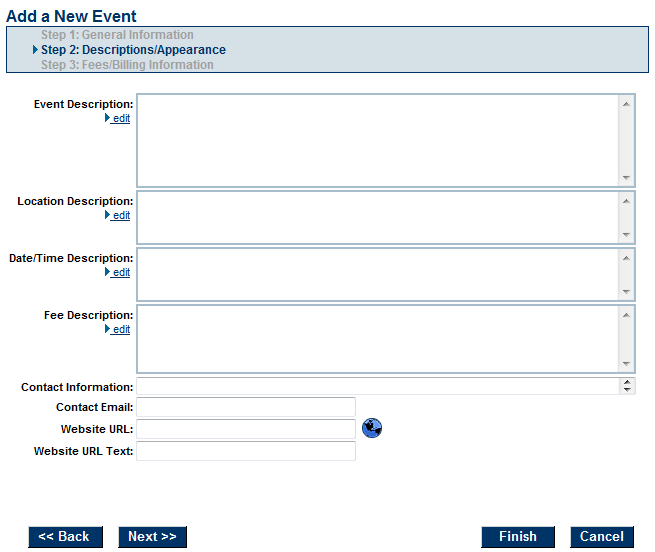
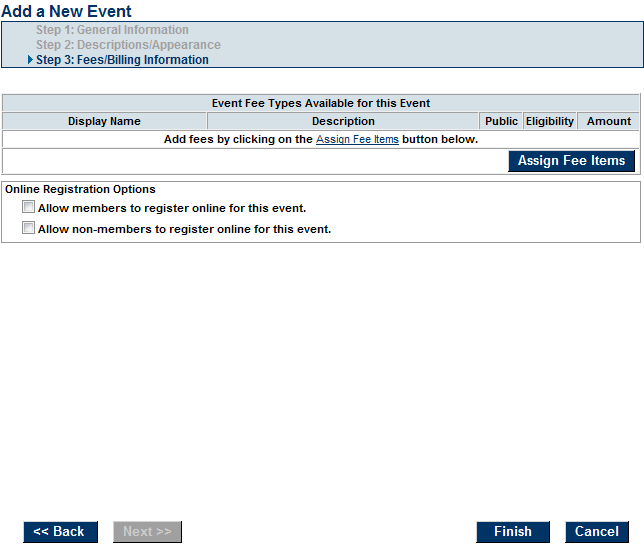
When adding a new event, you simply fill in the requested information as the wizard walks you through three information screens. You will be asked to fill in the following information screens:
- General Information
- Descriptions/Appearance
- Fees/Billing Information
When you click Finish, your event is automatically added to the designated event calendar(s).
You may add an event using one of two methods. Adding an event to the calendar may be done at any time using the Add menu and when by clicking the +sign when the Calendar tab is displayed, which uses the calendar to assist in date selection, or by nightly importing your iCal feed.
Add an Event
1. |
On the Add menu, click Event. |
2. |
Complete the General Information fields and click Next. |
3. |
Complete the Descriptions/Appearance fields and click Next. |
4. |
Complete the Fees/Billing Information fields and click Finish. |
Importing Events from an iCal Feed
The iCal feed import provides an ability for customers to upload their iCal list (from the Cloud drive or other http url used with iPhones, iPads etc and other similar calendars) and import directly into the event calendar. A URL is specified to the location of this iCal and then each night the events are synched. To import iCal feeds into the event calendar
- Click Setup in the left-hand menu.
- Click Event Options and Settings
- Open the General Settings area.
- Click the +Add button in the iCal Import section.
- Type the URL of the iCal feed.
- Click Save.
| Note: Once an iCal has been added, the events on that calendar may take up to 24 hours to display on your event calendar. |
| Note: Recurring events are not supported with the iCal import feature. |
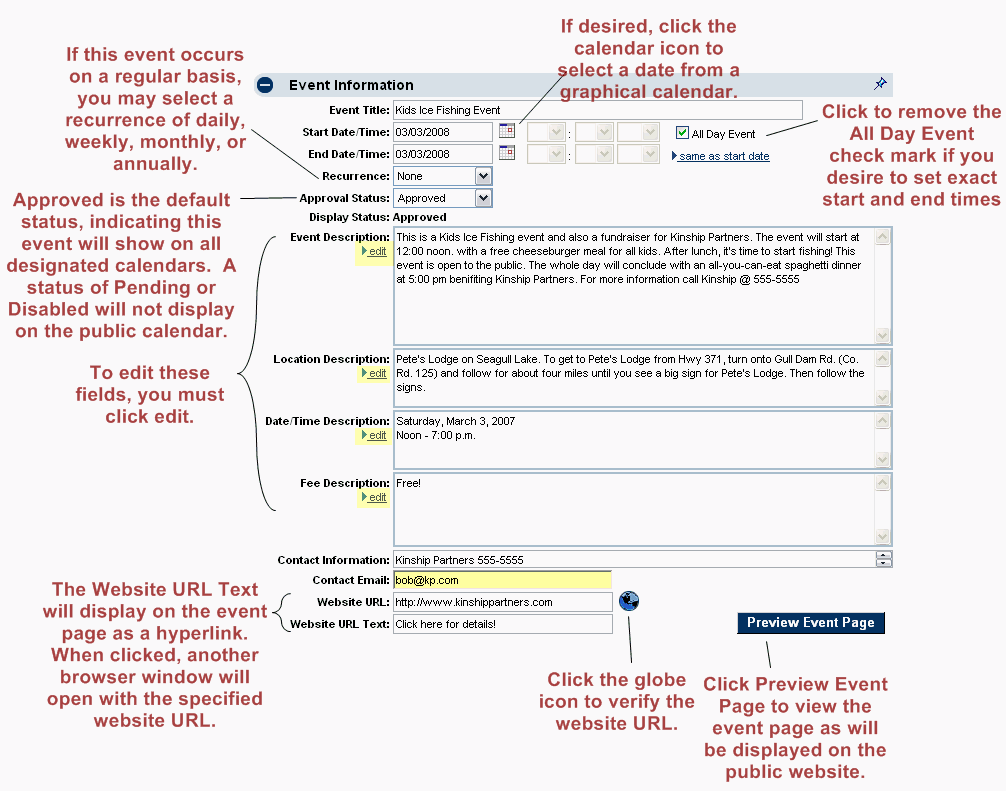
Editing Event Information
Edit Event Information
1. |
In the Events module, select the desired event. See “Selecting an Event.” |
2. |
On the General tab, modify the desired Event Information fields. |
3. |
Click Save. |
Photos and Images
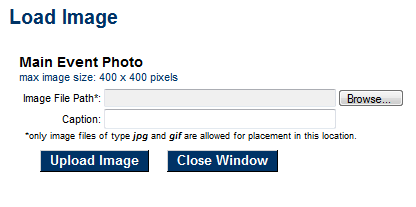
Add a Main Event Photo or a New Gallery Photo
1. |
On the General tab, click Add Image in the Action column of the Image Type that you wish to add in the Photos & Images area. |
2. |
Type the path and filename of the desired graphic file or click Browse to locate and click Open when desired graphic is located. |
3. |
Click Upload Image. |
4. |
Optional: If adding a Main Event photo, you may also complete the Caption field and then click save caption. |
5. |
Click Close Window. |
Remove a Main Event Photo or a Gallery Photo
1. |
On the General tab, click Remove Image in the Action column of the Image Type that you wish to remove in the Photos & Images area. |
Change an existing Main Event Photo or Gallery Photo
1. |
On the General tab, click Change Image in the Action column of the Image Type that you wish to change in the Photos & Images area. |
2. |
Type the path and filename of the desired graphic file or click Browse to locate and click Open when desired graphic is located. |
3. |
Click Upload Image. |
4. |
Click Close Window. |
Add a Video
1. |
On the General tab, click Add Video in the Action column in the Photos & Images area. |
2. |
Type or paste the YouTube “share link” for the desired video into the Event Video field. |
3. |
Click Save. |
Add a Map Image
1. On the Web tab, click the desired Map Image option button in the Image Type column in the Web Photos & Images area.
2. If selecting Uploaded Image, then click Add Image in the Action column. Type the path and filename of the desired graphic file or click Browse to locate and click Open when desired graphic is located. Click Upload Image. Click Close Window.
3. If selecting Google Maps or MapQuest, complete the address fields and then click Save.
Add Custom Fields
Create a recurring event
Set the recurrence of an event
Edit a specific instance
To edit all event instances
Placement Options
Select placement options
Select an event category
Edit event categories
Deleting an Event
Permanently delete an event
Syncing with your calendar
Sync Events with Outlook
Synch your events with Google Calendar
Synch your events with Apple iCalendar
Synch your events with your iPad or iPhone
Event Fees and Billing
Create Event Fees with CQI (Legacy)
Create Events Fees (Integrated Billing)
Assign Event Fees
Assign Event Registration Fees
Assign Additional Fee Item
Edit an Event Fee Once Assigned
Remove an Event Fee Once Assigned
Select Billing Preferences
Save Billing Preferences
Create Discount Options
Create an Age-Based discount
Create an Early Registration Discount
Create a Volume-Based Discount
Create Membership Type Discount
Create Promo Code Discount
View Account Information
View the Event Account Information
Create Event Invoices and Sales Receipts
Create Event Invoices/Sales Receipts when QuickBooks is Integrated
Create Event Invoices Using Integrated Billing Module
Sponsors
Managing Sponsors
Add a Sponsor
Remove a Sponsor
Add Additional Attendees with a Sponsor
Remove an Additional Attendee with a Sponsor
Add Additional Fee Items to a Sponsor
Remove an Additional Fee Item
Sponsor Web Display Options
Add a Sponsor Logo
Remove a Sponsor Logo
Change an Existing Sponsor Logo
Create Sponsorship Levels
Create Output from the Sponsor List (print, download, name tags, labels etc.)
Guest List
Invitations
Send Invitations
Create Mailing Labels for those with “No Invite Sent” Status
Register an Invitee
Resend Invitations to those not yet Registered
Working with the Guest List
Creating a Guest List
Managing the Guest List
Guest List Output Options
Send Event Reminders
Reports and Labels
Reports
Generate and Email a List of Events
Generate List of Events
Email the Event Listing
Customize Event Name Tags
Customize Online Event Calendar Display and Registration Options
Modify Event Options and Settings
Modify the list of Event Categories
Registration Options
FAQ
- Can I customize registration instructions and/or confirmation messages for my events?
- How do I create an event fee item that has limited quantities available?
- How do I create an event fee item that will automatically register multiple attendees – a table of 8, team of 4, etc.?
- How do I gather certain information for an event at the time of registration (meal choice, shirt size, seating preference, etc.)?
- How do I cancel an event registration?
- How do I add photos to an event?
- Can I edit or add to the event invitation that is created when sending the built-in invitation?
- Why is my event showing multiple times on the public calendar and I only entered it once?
- Why does the download of my event guest list include additional columns of items not related to my event?
Common Tasks
- Create an Event
- Create a Recurring Event
- Send Email Invitations for an Event
- Customize Event Name Tags
Help Documentation
Browse Events Help
