Project/Task Manager - Quick Start
Project/Task Manager can help you manage and track projects by allowing you to assign tasks to staff members, monitor the project’s progress and keep an eye on deadlines.
Project/Task Manager is easily accessible from your Backoffice Dashboard by clicking the Project/Task Manager link on the left navigation bar. Currently, this tool is in the beta stage and is available on the Pro version of ChamberMaster and MemberZone.

Using Project/Task Manager will give you the ability to:
- Assign projects and tasks to your staff members
- Track their progress with a “percentage complete” value
- Set deadlines for projects and tasks
- Keep an eye on the “big picture” with the Summary and Task Calendar pages
- Create templates for recurring projects like bringing on a new member
Create a New Project
- Click Projects/Task in the left-hand navigation panel.
- Click the Projects tab.
- Click the New Project button.
- Enter the following:
- Category: (Optional) Select a category project. Assigning categories make it easy to filter and report on project.
- Template: (Optional) If you have previously designed a template that can be used for this project, select it from the drop-down list.
- Name: Provide a name for the project. For Example: If you are creating a project for an event, you may wish to name it the same as the event. This field is required.
- Start Date: Enter the project start date.
- End Date: Enter the project end date. This field is required.
- Project Owner: Select a project owner from the drop-down list. All of your active staff members will be available for selection.
- Click Done.


The Projects tab will display the new project in the list of projects.
Add Tasks to a Project
Once a project has been created, you can add the tasks necessary to complete the project.
- On the Projects tab, click the hyper-link for the project to which you wish to add tasks.
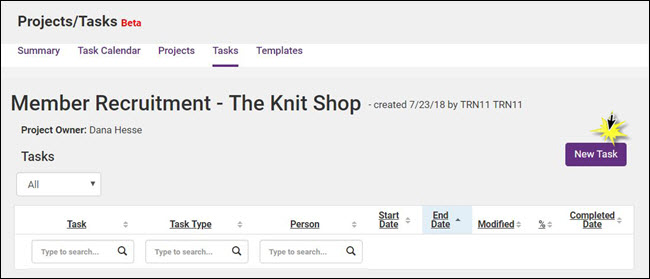
- On the Tasks' screen, click the New Task button.
- Enter the following information:
- Name: Provide a name for this task.
- Project: The project will default to the project that you clicked on the projects tab.
- Parent Task: If you wish to associate this task to a parent, enter the parent task name, or click the magnifying glass to search for the task.
- Description: (Optional) Enter a description of the task. While this is optional, it provides a means to add additional information about what needs to be accomplished to complete the task.
- Start Date: Enter the date on which activity on this task should begin.
- End Date: Enter the date this task should be completed. The end date will be used to identify tasks that are over-due.
- Assigned To: Select the staff member who is responsible for completing this task.
- Type: (Optional) Select the type of task from the drop-down list. Types are used for reporting and filtering. To add additional types, click the edit hyper-link.
- Priority: Select the priority you wish to associate to this event.
- Click Done.


What’s Next?
Now that you have created your first project, let’s explore some of the more advanced features of Project/Task Manager. The next section will introduce you to assigning owners, creating types, using the Summary screen and how to get the most out of these features.