Cancelling an Event Registration
Jump to navigation
Jump to search
↑ 
If someone has registered for an event, but chosen the wrong fee item and has already paid or been invoiced, complete these steps to cancel the registration so you can create a new one with the correct fee item.
| Note: If the registrant has not paid or been invoiced, simply edit the registration by clicking the Edit Registration icon and change the fee item. See Figure 1 below. |
Contents
Cancel the Registration
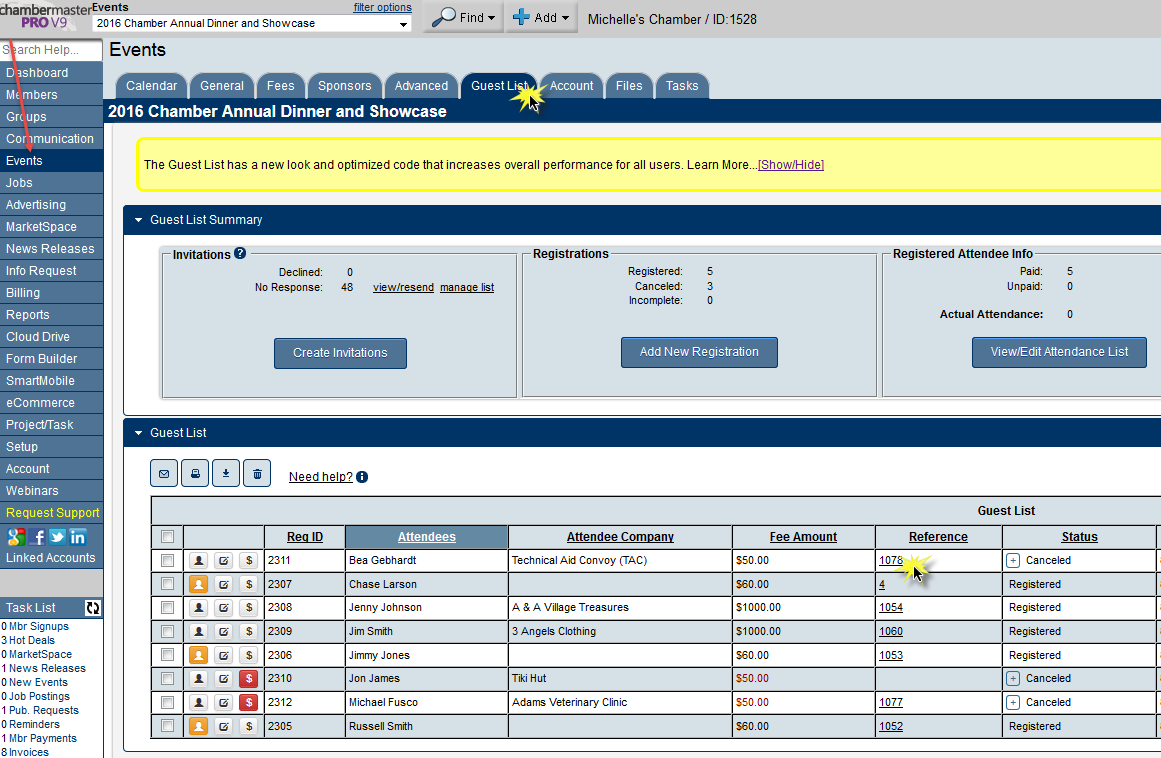
- 1. Go to Events➝Guest List
- 2. Locate the registration that needs to be cancelled
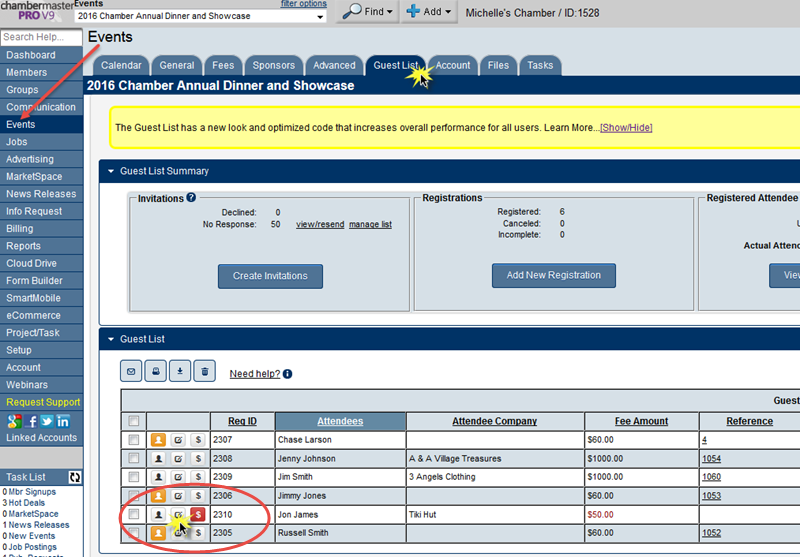
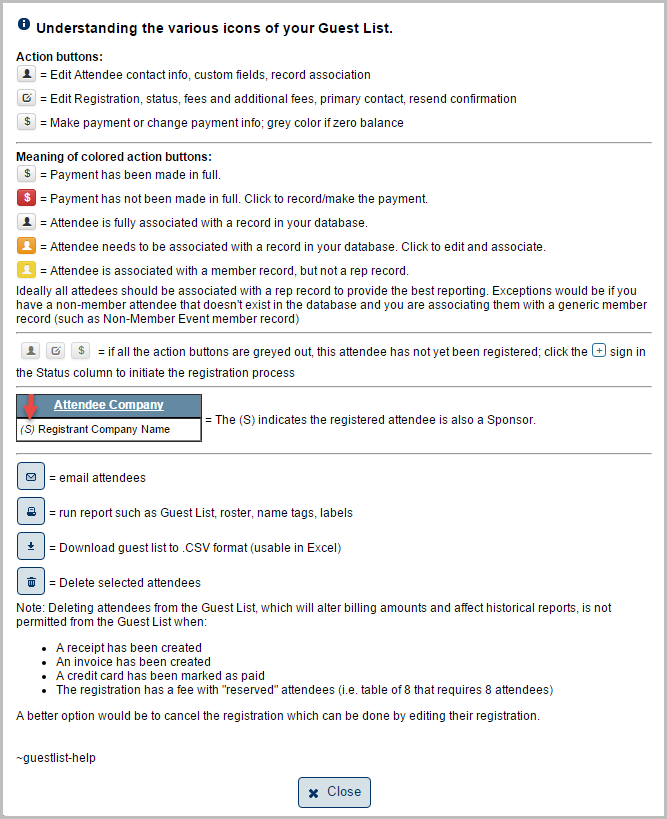
- 3. Click on the Edit Registration icon[1]
- Figure 1: Editing the Registration
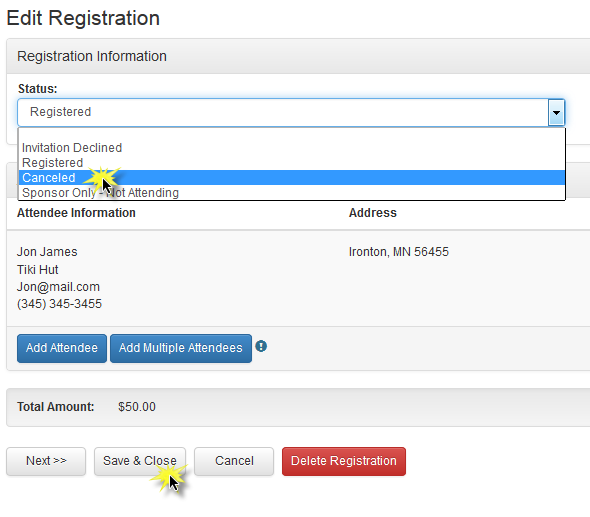
- 4. Change the status to Cancelled
- 5. Click Save & Close
- Figure 2: Cancelling the Registration
Writeoff, Refund, or Credit the Registrant (If Needed)
| Note: If there is a Reference number located on the Guest List a transaction has been created. |
Scenario 1: An invoice has been created and paid
Option 1: Issue a Credit on the Member’s account to be used later
- Steps:
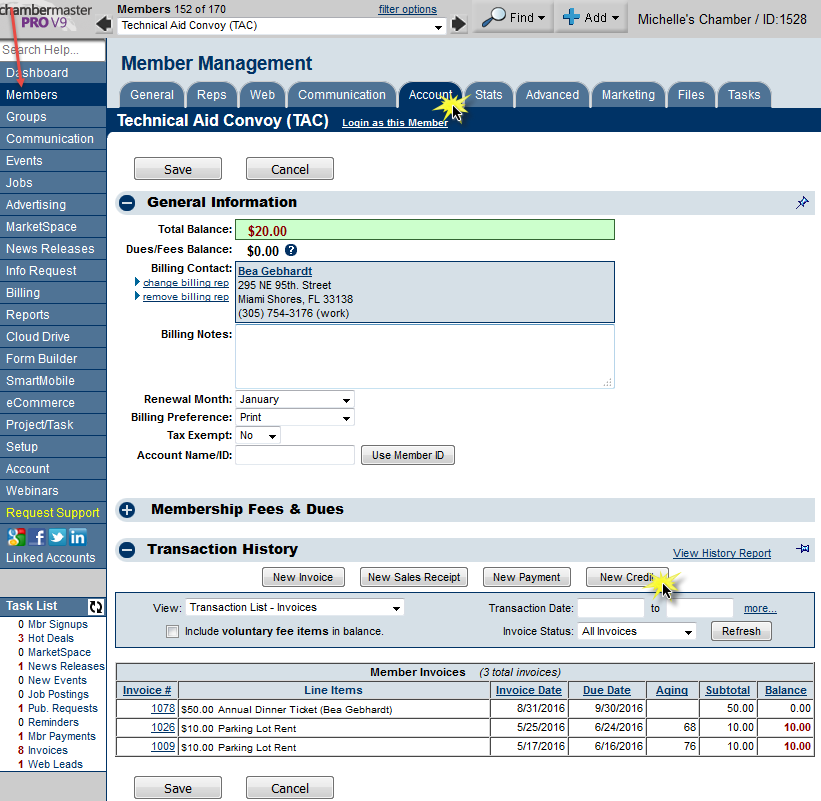
- 1. Go to Members ➝ Account ➝ Transaction History➝New Credit. (See Figure 3 below)
- Steps:
- Figure 3: Issuing a credit
- Option 2: Refund the money to the registrant
| Note: : If Sales Receipts were created the refund process will require a negative sales receipt to be manually created through the Members ➝Account➝ Transaction History➝ New Sales Receipt location. |
- Steps:
- 1. Go to Events ➝ Guest List
- 2. Click on the invoice reference number (See Figure 4 below)
- Steps:
- Figure 4: The Invoice Reference Number
- 3. In the Balance Summary area click the PAYMENT Ref # (See Figure 5 below)
- Figure 5: The PAYMENT Ref #
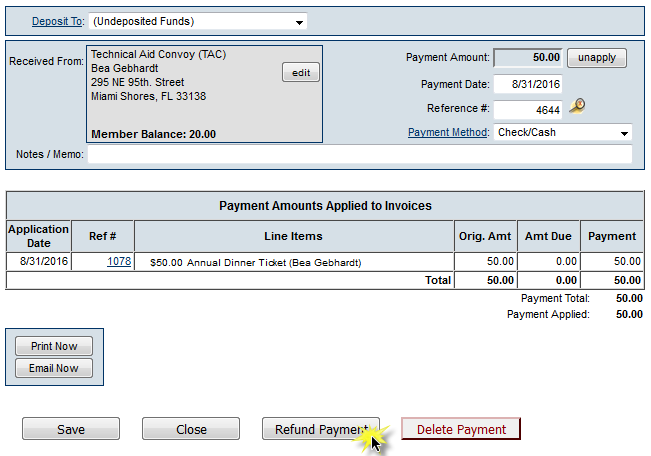
- 4. Click Refund Payment
- Figure 6: The Refund Payment button
- 5. Click Save. See ‘Refund’ for information on handling refunds
- 5. Click Save. See ‘Refund’ for information on handling refunds
