Difference between revisions of "Enable Customer Information Manager (CIM) with Authorize"
Jump to navigation
Jump to search
(No difference)
| |
Revision as of 13:36, 7 October 2015
If you are a customer with Authorize.Net, the Customer Information Manager can be enabled on your account with them which will allow secure storage of credit/debit cards and/or bank account information (referred to as epayment profiles ).
_with_A-CMBilling.1.106.1.jpg)
ChamberMaster / MemberZone then accesses these secure profiles to allow recurring credit/debit card billing or recurring ACH transactions from ChamberMaster / MemberZone. This feature also allows a member to save account information for use next time they pay a bill or checkout.
Enable Customer Information Manager (CIM) with Authorize.Net
Note: these steps may change but should give the general idea of what it may look like on your Authorize.Net account.
1. |
Login to your Authorize.Net account at [[1]]. |
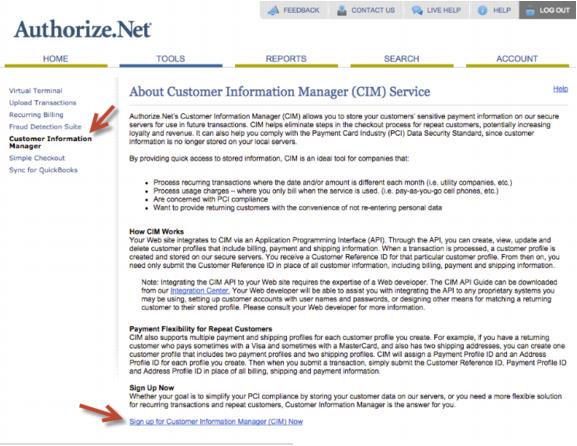
2. |
Select Customer Information Manager (CIM) from the home screen. |
3. |
Click on Sign up for Customer Information Manager (CIM) Now. |
_with_A-CMBilling.1.106.2.jpg)
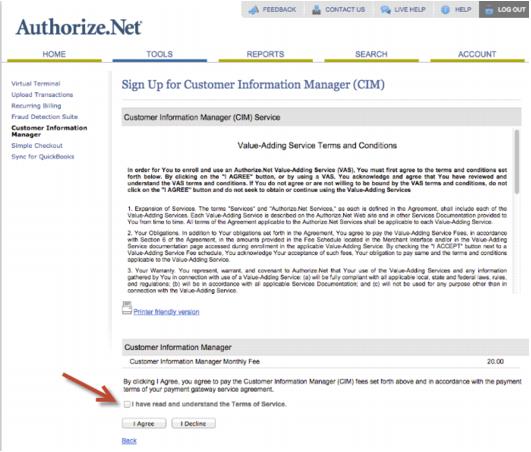
4. |
Select the checkmark I have read and understand the Terms of Service. Click I Agree. |
_with_A-CMBilling.1.106.3.jpg)
5. |
You are now signed up and ready to enable the settings in ChamberMaster / MemberZone. |
After signing up, there is an option to view and manage the payment profiles in Authorize.Net under Products and Services or under the Home menu. ChamberMaster /MemberZone also provides the option to add and edit payment profiles.