Difference between revisions of "Customize Event Name Tags"
Jump to navigation
Jump to search
(Created page with "<div xmlns="http://www.w3.org/1999/xhtml"> <div style="text-align: left;">Table of Contents | Previous | Eve...") |
|||
| (5 intermediate revisions by the same user not shown) | |||
| Line 1: | Line 1: | ||
| − | + | Name tags may be created that will list a participant's name and business name. If you desire additional participant information or to include a graphic on the name tab, you may wish to download the name tag data and import into Microsoft Word where you can customize the name tag as desired. | |
| − | + | ==Download the Name Tag Data== | |
| − | + | :1. Click '''Events''' in the left-hand navigation bar. | |
| − | + | ||
| − | + | :2. Select the desired event from the '''Events''' drop-down list. | |
| − | + | ||
| − | + | :3. Click the '''Guest List''' tab. | |
| − | + | ||
| − | + | :4. In the '''Guest List''' section click on the '''Report''' button | |
| − | + | ||
| − | + | ||
| − | + | ::[[File:cnt1.png]] | |
| − | + | ||
| − | + | ||
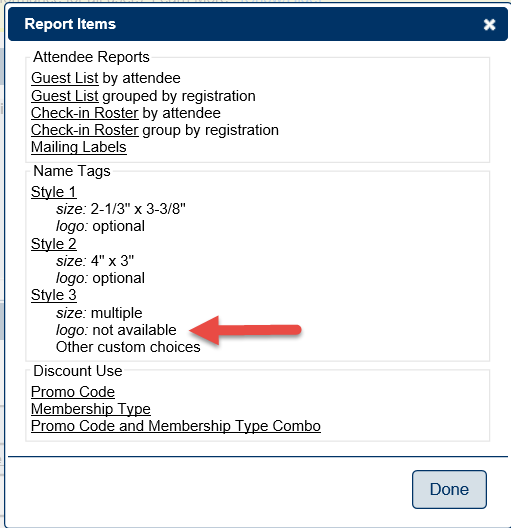
| − | + | :5. In the '''Report Items''' window select '''Style 3''' | |
| − | + | ||
| − | + | ||
| − | + | ::[[File:cnt2.png]] | |
| − | + | ||
| − | + | ||
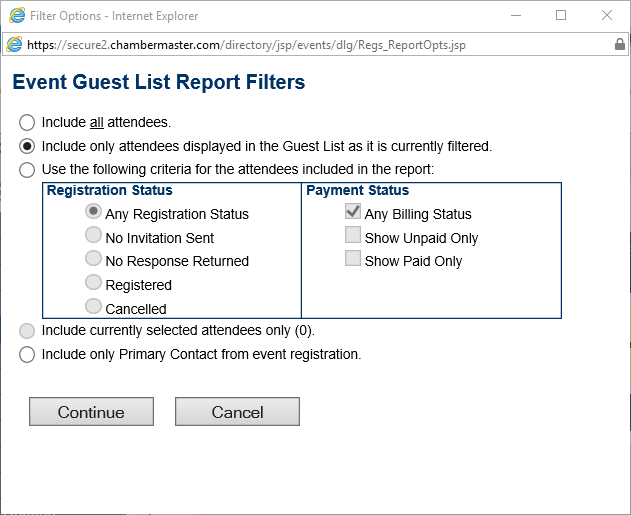
| − | + | :6. Complete the '''Guest List Report Filters''' | |
| − | + | ||
| − | + | ||
| − | + | ::[[File:cnt3.png]] | |
| + | |||
| + | |||
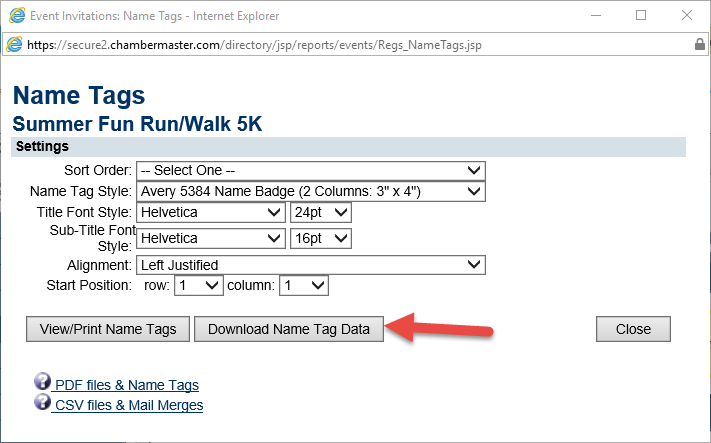
| + | :7. On the '''Name Tags''' options screen click the '''Download Name Tag Data''' | ||
| + | |||
| + | |||
| + | ::[[File:cnt4.png]] | ||
Revision as of 19:36, 5 September 2016
Name tags may be created that will list a participant's name and business name. If you desire additional participant information or to include a graphic on the name tab, you may wish to download the name tag data and import into Microsoft Word where you can customize the name tag as desired.
Download the Name Tag Data
- 1. Click Events in the left-hand navigation bar.
- 2. Select the desired event from the Events drop-down list.
- 3. Click the Guest List tab.
- 4. In the Guest List section click on the Report button
- 5. In the Report Items window select Style 3
- 6. Complete the Guest List Report Filters
- 7. On the Name Tags options screen click the Download Name Tag Data


